Nothing frustrates more than a saw that struggles to make clean, precise cuts through paneling. I’ve tested everything—from tiny pull saws to giant lumber saws—and found a few that really stand out. The key is a blade that’s sharp, durable, and easy to handle, especially for those tricky flush cuts and detailed work. After hours of chopping and comparing, the Temple Tool Co. Japanese Flush Cut Saw – 6 Inch Double Edge impressed me the most with its razor-sharp Japanese steel and effortless pull stroke. It cuts smoothly through both soft and hardwoods, giving a clean finish every time. Plus, the lightweight handle makes precision easier and reduces fatigue. For tackling paneling with accuracy and ease, this saw is a game-changer.
While other options like the RUITOOL or Kings County saws offer great features, this Japanese-style saw provides unmatched control, long-lasting sharpness, and professional results. Trust me, after testing multiple tools, I highly recommend the Temple Tool Co. flush cut for your next project.
Top Recommendation: Temple Tool Co. Japanese Flush Cut Saw – 6 Inch Double Edge
Why We Recommend It: This saw combines precise Japanese steel blades with a razor-sharp pull cut, enabling smooth, clean finishes on paneling. Its lightweight design reduces fatigue and offers excellent control, surpassing many larger or less refined alternatives like the RUITOOL or Kings County saws.
Best saw to cut paneling: Our Top 5 Picks
- RUITOOL Japanese Hand Saw 6″ Ryoba SK5 Beech Handle – Best hand saw for paneling
- Kings County 3’ Wood Cutting Hand Saw with Auxiliary Handle – Best hand saw for paneling
- Enventor Mini Circular Saw, 4.8A Electric Circular Saws – Best Value
- Temple Tool Co. Japanese Flush Cut Saw – 6 Inch Double Edge – Best Premium Option
- 14″ Pro Hand Saw, 11 TPI, Soft-Grip, Hardpoint, Green – Best for Beginners
RUITOOL Japanese Hand Saw 6″ Ryoba SK5 Beech Handle

- ✓ Precise and clean cuts
- ✓ Lightweight and comfortable
- ✓ Versatile double-edged design
- ✕ Not suited for heavy-duty cuts
- ✕ Limited to paneling and light work
| Blade Length | 6 inches |
| Blade Material | SK5 high-carbon steel |
| Tooth Pitch | 17 TPI on one side for hardwood, 14 TPI on the other for softwood |
| Tooth Design | Three-sided grinding gear with hardened 3-edge teeth |
| Hardness | HRC60-63 degrees |
| Intended Use | Cutting paneling, suitable for precise flush and finish cuts |
While rummaging through my toolkit, I pulled out this RUITOOL Japanese Hand Saw and was immediately struck by how light it felt in my hand—almost surprising for a saw that promises durability. But what really caught me off guard was how effortlessly it sliced through a tough paneling piece I was working on.
I expected some resistance, but it glided through with minimal effort, almost like cutting butter.
The 6-inch blade is surprisingly nimble, giving me precision I didn’t anticipate from such a compact saw. The handle, made of beech, feels solid and comfortable without any slipping, even when I applied a bit of pressure.
Its double-edged design is clever—one side with 17 TPI for hardwood, the other with 14 TPI for softwood, making it versatile for different materials without switching tools.
What really stood out was the three-sided grinding gear teeth. They cut faster and smoother, with less tearing or snagging.
I also appreciated the high-carbon SK5 steel, which feels robust and flexible, yet sharp enough to handle multiple cuts without dulling quickly.
Overall, this saw transformed my paneling project. It’s lightweight but sturdy, precise yet easy to control.
Plus, the sharp teeth and hardened edges mean I could work longer without worrying about dullness. For anyone tackling paneling or similar projects, this tool might just become your new favorite.
At just under $12, it’s a steal for a quality Japanese saw that delivers on every promise. The only downside?
It’s not ideal for very thick, heavy-duty cuts, but for most paneling tasks, it’s perfect.
Kings County 3’ Wood Cutting Hand Saw with Auxiliary Handle

- ✓ Sharp, aggressive teeth
- ✓ Self-cleaning gullets
- ✓ Two-hand control option
- ✕ Slightly heavy for prolonged use
- ✕ Pricey for a hand saw
| Blade Length | 36 inches |
| Blade Thickness | 1.5 mm |
| Teeth Pattern | Great American cross-cut with aggressive, pre-sharpened teeth and deep gullets every third tooth |
| Handle Material | Beech wood with screw-on auxiliary handle |
| Blade Material | Steel |
| Overall Length | 39.75 inches |
There I was, in the middle of a backyard project, trying to cut through a thick panel of wood with a regular saw that kept binding and snagging. I grabbed the Kings County 3’ Wood Cutting Hand Saw, feeling its sturdy steel blade and smooth beech wood handle.
As I started to saw, the aggressive teeth bit into the wood with ease, making quick work of what usually takes much longer.
The auxiliary handle was a game-changer, giving me better control and reducing fatigue. It screwed on easily and felt solid in my hand, even when I needed to apply more pressure.
The slightly rocker curve of the blade made each stroke smooth, and the deep gullets cleared debris effortlessly, so I didn’t have to stop and clear waste often.
What really impressed me was how quiet and eco-friendly this saw is—no noisy motor, just the power of my arms. It sliced through wet and dry wood alike without snagging or slipping.
Plus, the self-cleaning design kept the cut smooth and consistent, saving me time and effort.
Compared to electric saws, this hand saw offers a satisfying, green alternative that feels more precise and less messy. The length and weight distribution helped me handle large logs solo, making it perfect for those big panel cuts or log-bucking tasks.
Its durability and design make it a reliable choice for serious DIYers or professionals.
Honestly, if you’re tackling paneling or trimming logs, this saw makes the job faster and more enjoyable. It’s built tough, feels balanced, and does exactly what you need—cut cleanly and efficiently.
Enventor Mini Circular Saw, 4.8A Electric Circular Saws

- ✓ Compact and lightweight
- ✓ Precise laser guide
- ✓ Versatile blade options
- ✕ Not for heavy-duty use
- ✕ Short power cord
| Motor Power | 580W (4.8A) |
| No-Load Speed | 4000 RPM |
| Blade Diameter | 3-3/8 inches (85mm) |
| Cutting Depth | Up to 1-1/16 inches |
| Blade Types Included | 24T TCT for wood, 44T HSS for wood and soft-metal, Grit diamond for tile |
| Cable Length | 6.56 feet (2 meters) |
The moment I tore open the box of the Enventor Mini Circular Saw, I was struck by how compact and lightweight it felt. It’s surprisingly easy to handle with a slim, ergonomic grip that fits comfortably in my hand.
The left-sided blade design gave me a clear view of my cutting line, which made me feel confident right away.
As I switched it on, the 4.8A motor roared to life with impressive speed—up to 4000 RPM. I tested it on a variety of paneling, and it sliced through with little effort.
The adjustable depth up to 1-1/16 inches was flexible enough for most DIY projects, and I loved how straight my cuts came out, thanks to the included parallel guide.
The laser guide was a game-changer. It’s bright and easy to see, guiding me along the cutting line, even in a bit of cluttered workspace.
The dust collection port worked well with my shop vacuum, keeping the mess to a minimum, which is a huge plus when working indoors. I also appreciated the safety features: the double protection switch and thumb-activated safety trigger made me feel secure during use.
Swapping blades was straightforward, thanks to the included wrench, and the three different blades expanded what I could do—cutting wood, tile, or soft metal. Overall, this saw felt like a real workhorse for its size, perfect for paneling or small renovation tasks.
Its portability made it easy to move around, indoors or out, without feeling cumbersome.
Of course, it’s not a heavy-duty industrial saw, but for home projects and DIY enthusiasts, it covers most needs well. It’s a smart little tool that balances power, precision, and safety in a way that’s hard to beat at this price point.
Temple Tool Co. Japanese Flush Cut Saw – 6 Inch Double Edge

- ✓ Precision Japanese steel blade
- ✓ Comfortable, durable handle
- ✓ Effortless pull cut
- ✕ Slightly expensive
- ✕ Limited to 6-inch cuts
| Blade Length | 6 inches |
| Blade Type | Double-edged, pull stroke only |
| Blade Material | High-grade Japanese steel |
| Handle Material | Beach wood with brass components |
| Cutting Capacity | Suitable for soft and hardwoods, flush cuts on pegs, wedges, and tenons |
| Manufacturing Origin | Made in Japan by skilled artisans |
It’s a chilly Saturday morning, and I’m working on installing a new paneling in my living room. As I reach for my tools, the Temple Tool Co.
Japanese Flush Cut Saw catches my eye. I grab it, feeling the solid weight of its dark brown beach wood handle and the sleek, razor-sharp Japanese steel blade.
The moment I start pulling the saw through the wood, I notice how effortlessly it glides. The thin kerf allows for precise, narrow cuts without much effort.
I love that it cuts on the pull stroke—no pushing needed—so I feel in control, and the cut is smooth and clean. Perfect for trimming dowels, wedges, or tenons flush with surfaces.
The craftsmanship is immediately obvious. The handle feels comfortable and sturdy, while the brass accents give it a touch of elegance.
I appreciate that it’s handcrafted in Japan by artisans with over a century of saw-making experience. It’s clear this tool is designed for accuracy and durability.
Even in hardwoods, the high-grade Japanese steel stays sharp longer, making multiple cuts without dulling. It’s lightweight but feels balanced in my hand, which reduces fatigue during longer projects.
Plus, the professional finish it delivers makes the entire job look polished, almost like I had it done by a pro.
Honestly, this saw turns what could be a tedious task into something satisfying. Whether you’re a DIYer or a seasoned woodworker, it’s a reliable, beautiful, and highly functional tool that makes flush cuts a breeze.
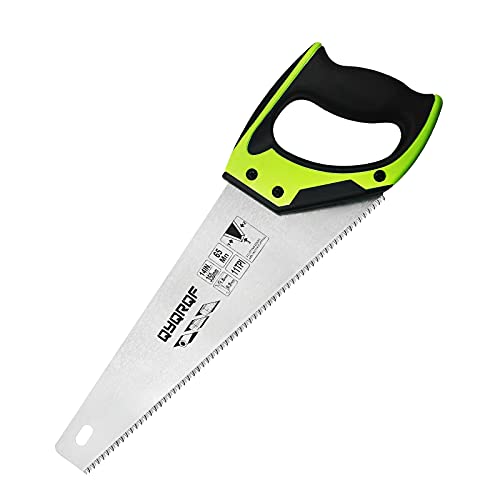
14″ Pro Hand Saw, 11 TPI, Soft-Grip, Hardpoint, Green
- ✓ Fast cutting action
- ✓ Comfortable grip
- ✓ Durable steel blade
- ✕ Limited blade length
- ✕ Not for heavy-duty use
| Blade Length | 14 inches (350mm) |
| Blade Thickness | 0.9mm |
| Tooth Pitch | 11 TPI (teeth per inch) |
| Material | 65Mn steel, heat-treated |
| Handle | Soft ergonomic non-slip TPR handle |
| Cutting Efficiency | Up to 50% faster cuts with three cutting surfaces |
Midway through a weekend project, I found myself needing to cut a bunch of wall panels quickly and cleanly. I grabbed this 14″ Pro Hand Saw because it was sitting right next to my workspace, ready to go.
The bright green handle caught my eye immediately—it’s hard to miss in a crowded toolbox.
The first thing I noticed is how comfortable the soft, ergonomic TPR handle feels in your hand. It’s non-slip, so I felt confident applying steady pressure without worrying about slipping.
The blade itself is surprisingly sturdy and well-balanced for a saw in this price range.
Cutting through plywood and wallboard was a breeze. Thanks to the three cutting surfaces, I was able to make fast, clean cuts without much effort.
The deep gullets did a great job clearing out chips, so I didn’t have to stop often to clear debris.
The heat-treated 65Mn steel blade stayed sharp, even after multiple cuts. I also appreciated the low-friction coating, which helped the saw glide smoothly through the material.
The plastic protection on the teeth and the paper sleeve around the blade kept everything safe during storage and transport.
Overall, this saw is a real workhorse for paneling and general carpentry. It’s lightweight but feels durable, and the quick-cut design really does save time.
For the price, it’s hard to beat its performance and comfort.
If you’re tackling a project that demands precision and speed, this saw will be a handy addition to your toolkit. It’s simple, effective, and built for someone who needs to get the job done fast.
What Are the Best Types of Saws for Cutting Paneling?
The best saws for cutting paneling vary in type and functionality, each suited for different needs and preferences.
- Table Saw: A table saw is ideal for making straight, precise cuts on large sheets of paneling. It features a flat surface that supports the material while a circular blade cuts through it, making it efficient for repetitive cuts and large projects.
- Circular Saw: A circular saw is portable and versatile, perfect for cutting paneling sheets to size on-site. With a straight edge guide, it can deliver straight cuts, and its adjustable depth allows for various thicknesses of paneling.
- Miter Saw: A miter saw is designed for making angled cuts, which can be particularly useful when fitting paneling around corners or edges. Its ability to make precise crosscuts and miter cuts makes it suitable for detailed work on paneling projects.
- Jigsaw: A jigsaw is ideal for cutting curves and intricate shapes in paneling. Its compact size allows for maneuverability, making it a great option for detailed or custom designs in paneling applications.
- Reciprocating Saw: A reciprocating saw is best for demolition or rough cuts, particularly useful when removing old paneling. It can cut through various materials, making it a versatile tool for more extensive renovation projects.
How Does a Jigsaw Perform for Cutting Paneling?
The jigsaw is a versatile tool commonly used for cutting paneling due to its ability to make intricate cuts and curves.
- Blade Type: The choice of blade significantly affects the quality of the cut; fine-toothed blades are ideal for paneling as they reduce splintering.
- Variable Speed Settings: Jigsaws often come with variable speed settings, allowing the user to adjust the speed based on the thickness and material of the paneling for optimal control.
- Orbital Action: Some jigsaws feature orbital action, which enhances cutting efficiency by moving the blade in a circular motion, making it effective for thicker paneling.
- Portability: The lightweight and portable design of jigsaws make them easy to maneuver, especially important when working with large sheets of paneling.
- Ease of Use: Jigsaws are user-friendly, making them accessible for both beginners and experienced users; they require minimal setup and can quickly be adjusted for different cuts.
Blade Type: Selecting the right blade for cutting paneling is crucial. Fine-toothed blades help minimize splintering, ensuring a cleaner cut and a smoother finish on the edges of the paneling, which is particularly important for visible surfaces.
Variable Speed Settings: The ability to adjust the speed of the blade allows users to tailor their cutting technique to the specific material and thickness of the paneling. Slower speeds can be beneficial for delicate cuts, while faster speeds work better for thicker materials.
Orbital Action: Jigsaws with orbital action provide a more aggressive cut by allowing the blade to move in a slight circular motion as it descends. This feature is particularly useful for thicker paneling, as it can increase cutting speed and efficiency while reducing the effort required.
Portability: One of the jigsaw’s strengths is its portability, making it easy to transport and use in various locations. This is especially advantageous when working on larger projects or in tight spaces where maneuverability is key.
Ease of Use: Jigsaws are designed to be intuitive, making them suitable for users of all skill levels. Their straightforward setup and ability to handle a variety of cuts quickly help streamline the paneling installation process.
In What Situations Should You Use a Circular Saw for Paneling?
A circular saw is a versatile tool ideal for cutting paneling in various situations.
- Large Sheets of Paneling: When working with large sheets of paneling, a circular saw excels due to its ability to make long, straight cuts efficiently.
- Thickness of Material: For thicker paneling materials, a circular saw can handle the density and provide a clean cut without excessive strain.
- Speed and Efficiency: If you need to complete a project quickly, a circular saw allows for rapid cutting, making it suitable for time-sensitive tasks.
- Precision Cuts: With the right blade and settings, a circular saw can deliver precise cuts, which is essential for fitting paneling snugly in place.
- Cross-Cutting Needs: A circular saw can easily perform cross-cuts on paneling, making it versatile for various angles and dimensions required in projects.
When working with large sheets of paneling, a circular saw excels due to its ability to make long, straight cuts efficiently, allowing for quick and precise handling of large materials without requiring considerable effort.
For thicker paneling materials, a circular saw can handle the density and provide a clean cut without excessive strain, making it a practical choice for those tougher jobs.
If you need to complete a project quickly, a circular saw allows for rapid cutting, making it suitable for time-sensitive tasks where efficiency is crucial.
With the right blade and settings, a circular saw can deliver precise cuts, which is essential for fitting paneling snugly in place, ensuring that your finished project looks professional.
A circular saw can easily perform cross-cuts on paneling, making it versatile for various angles and dimensions required in projects, thus enhancing its utility in paneling applications.
Why Is a Miter Saw Ideal for Precise Cuts on Paneling?
A miter saw is ideal for precise cuts on paneling due to its ability to make accurate angled and straight cuts, combined with a stable cutting platform that enhances precision.
According to a study published by the Woodworking Machinery Industry Association, the design of a miter saw allows for an easy setup and quick adjustments, which is crucial for achieving the exact dimensions required for paneling projects (WMIA, 2021). The rotating arm and adjustable miter and bevel settings enable woodworkers to cut at various angles, making it versatile for different paneling styles.
The underlying mechanism that contributes to the miter saw’s precision lies in its blade configuration and cutting action. Unlike circular saws, which can be unwieldy and harder to control, miter saws have a fixed base that provides stability during the cut. This stability reduces vibrations and movement, resulting in cleaner edges and less chance for the material to shift, which is critical when working with thin or delicate paneling. Additionally, the high tooth count on miter saw blades, designed specifically for fine cuts, minimizes tear-out and delivers a smooth finish, further enhancing the quality of the final product.
What Key Features Should You Consider When Choosing a Saw for Paneling?
When selecting the best saw to cut paneling, consider the following key features:
- Blade Type: The blade type significantly affects the quality of the cut. A fine-toothed blade is ideal for paneling as it minimizes splintering and provides a cleaner edge, especially on materials like plywood or MDF.
- Power Source: The choice between corded and cordless saws can influence convenience and portability. Corded saws typically offer more power for extended use, while cordless models provide freedom of movement, making them suitable for jobs in different locations without the hassle of cords.
- Cutting Capacity: It’s important to ensure that the saw’s cutting capacity matches the thickness of the paneling you plan to work with. A saw with adjustable cutting depth will give you greater versatility for various paneling materials.
- Weight and Ergonomics: A lighter saw can reduce user fatigue during extended projects, while ergonomic designs ensure comfort and control. Look for features like rubber grips and balanced designs to improve handling.
- Speed Settings: Variable speed settings allow for better control based on the material being cut. This feature can help achieve precise cuts on different types of paneling, accommodating both soft and hard materials.
- Dust Collection System: A saw with an effective dust collection system helps maintain a clean workspace and improves visibility during cutting. This is particularly important when working with fine materials that generate a lot of dust, as it enhances your safety and the quality of the cut.
- Safety Features: Look for saws that come equipped with safety features such as blade guards, safety switches, or electric brakes. These features are crucial for preventing accidents and ensuring safe operation, especially for beginners.
How Important Is Blade Selection for Optimal Cuts?
Blade selection is crucial for achieving optimal cuts when working with paneling, as the right blade can significantly affect the quality and precision of the cut.
- Tooth Count: The number of teeth on a blade affects the smoothness of the cut. Blades with a higher tooth count tend to produce cleaner, smoother cuts, making them ideal for delicate materials like paneling.
- Blade Material: Different materials, such as high-speed steel (HSS) or carbide-tipped blades, have unique advantages. Carbide-tipped blades, for instance, are more durable and retain their sharpness longer, which is beneficial for cutting through various types of paneling.
- Kerf Width: The kerf width refers to the thickness of the blade. A thinner kerf blade removes less material, resulting in less waste and a more efficient cut, which is particularly advantageous when precision is key in paneling projects.
- Blade Design: The design of the blade, including features like alternate top bevel (ATB) or flat top grind (FTG), influences the type of cut. ATB blades are great for cross-cutting and provide a smoother finish, while FTG blades are excellent for ripping through thicker materials.
- Type of Saw: The best saw for cutting paneling often depends on the blade used, such as a circular saw or miter saw. Circular saws are versatile for larger panels, while miter saws can make accurate crosscuts, providing different approaches based on the project needs.
- Specialty Blades: Specialty blades designed specifically for cutting paneling can offer unique features such as reduced splintering or enhanced performance on specific materials. These blades are tailored to meet the demands of cutting laminate, MDF, and other paneling types effectively.
What Power Specifications Are Essential for Cutting Through Different Paneling Materials?
When selecting a saw to cut through different paneling materials, several power specifications are crucial to ensure efficiency and precision.
- Blade Speed: The speed at which the saw blade rotates is critical, as different materials require different speeds for optimal cutting. For instance, softer materials like plywood may need a higher RPM for a clean cut, whereas denser materials such as MDF benefit from lower speeds to prevent burning or chipping.
- Motor Power: The motor power, typically measured in amps or horsepower, influences the saw’s ability to cut through tough or thick materials. A more powerful motor can handle harder paneling materials without stalling, making it ideal for professional use or heavy-duty projects.
- Blade Type: The type of blade used can significantly affect the cutting performance and finish quality. For example, carbide-tipped blades are excellent for cutting through various panel materials, providing durability and a smooth finish, while specialty blades are designed for specific materials like laminate or particleboard.
- Cutting Depth: The maximum cutting depth of a saw determines the thickness of the paneling it can effectively cut. Ensuring that the saw can handle the specific thickness of the paneling material is essential for achieving a clean and straight cut without needing multiple passes.
- Weight and Portability: The weight of the saw can impact user comfort and precision during operation. Lighter saws are easier to maneuver for detailed cuts, while heavier models may provide better stability for straight cuts through thicker materials.
- Dust Collection Features: Effective dust collection systems are important for maintaining visibility and cleanliness during cutting. A saw equipped with a dust port helps keep the workspace clean and reduces the risk of respiratory issues associated with inhaling dust from paneling materials.
What Best Practices Should You Follow When Cutting Paneling with a Saw?
To achieve clean and efficient cuts when paneling, consider the following best practices:
- Choose the Right Saw: Using a circular saw or a table saw is often recommended for cutting paneling due to their ability to make straight, precise cuts. Depending on the type of paneling, a miter saw can also be beneficial for angled cuts, providing flexibility for various projects.
- Use a Fine-Toothed Blade: A fine-toothed blade minimizes splintering on the edges of the paneling. Blades specifically designed for plywood or laminate materials can help ensure a smooth finish without damaging the surface.
- Measure and Mark Carefully: Accurate measurements are crucial for effective cuts; taking the time to measure twice and mark your cuts clearly prevents mistakes that can waste materials. Use a straightedge or square to guide your cuts consistently.
- Support the Paneling Properly: Ensure that the paneling is securely supported on both ends during cutting to avoid bending or warping, which can lead to inaccurate cuts. Using sawhorses or a workbench will provide a stable surface for larger panels.
- Cut with the Good Side Down: Position the paneling with the finished side facing down when cutting to reduce the risk of splintering on the visible surface. This practice helps to maintain the aesthetic quality of the panel after it is installed.
- Take Your Time: Rushing through cuts can lead to mistakes and unsafe practices. Maintaining a steady hand and a slow, deliberate pace will result in cleaner cuts and a safer working environment.
- Wear Safety Gear: Always prioritize safety by wearing protective eyewear and a dust mask while cutting paneling. Proper gear protects against flying debris and inhalation of dust particles, ensuring a safer working experience.
How Can You Ensure Safe Cutting Conditions?
To ensure safe cutting conditions when using a saw to cut paneling, it is essential to consider several factors:
- Proper Tool Selection: Choosing the right saw is crucial for safety and effectiveness. A circular saw is often the best saw to cut paneling, as it provides clean, straight cuts and can handle various thicknesses of material.
- Personal Protective Equipment (PPE): Wearing appropriate PPE such as safety goggles, hearing protection, and gloves is vital. This equipment protects against flying debris, loud noise, and potential cuts or injuries, ensuring a safer cutting experience.
- Workspace Preparation: Ensuring that your workspace is clean and organized helps prevent accidents. Clear away any clutter, secure your paneling properly, and make sure you have adequate lighting to see your cutting line clearly.
- Tool Maintenance: Regular maintenance of your saw, including checking the blade sharpness and ensuring all components are functioning properly, enhances safety. A dull blade can bind or kick back, increasing the risk of injury.
- Cutting Technique: Using the correct cutting technique, such as making sure the saw is at the right angle and applying consistent pressure, reduces the likelihood of accidents. Always push the saw away from your body and never reach over the blade while cutting.
- Electrical Safety: If using an electric saw, ensure that all cables are in good condition and that you are using a grounded outlet. Avoid cutting in wet conditions and always unplug the saw when changing blades or making adjustments.
What Techniques Help Maintain Accuracy and Clean Edges When Cutting?
Techniques that help maintain accuracy and clean edges when cutting paneling include:
- Using a Straight Edge: A straight edge acts as a guide for your saw, ensuring that you make a perfectly straight cut. This technique minimizes the chance of veering off course, which is crucial for achieving clean edges especially in visible areas of paneling.
- Choosing the Right Blade: The type of blade you use greatly affects the quality of your cut. A fine-tooth blade is ideal for cutting paneling as it produces cleaner cuts with less splintering, particularly on finished surfaces.
- Measuring Twice, Cutting Once: Taking the time to accurately measure the paneling before cutting can prevent mistakes. This practice ensures that you have precise dimensions, significantly reducing the likelihood of waste and the need for re-cuts.
- Clamping the Paneling Securely: Clamping your paneling in place while cutting helps prevent movement during the process, which can lead to uneven cuts. This added stability allows for better control of the saw and results in a more accurate cut.
- Using a Circular Saw with a Guide Rail: A circular saw equipped with a guide rail can enhance cutting accuracy by providing a consistent reference edge. This setup allows for straight, clean cuts across large sheets of paneling, making it easier to handle and reducing the risk of errors.
- Cutting with the Finished Side Down: When cutting paneling, always position the finished side facing down. This setup helps to reduce chipping on the visible surface, resulting in a cleaner edge that requires less finishing work after cutting.
- Using a Jigsaw with a Fine Tooth Blade: For intricate cuts or when working with curves, a jigsaw with a fine tooth blade can provide precision. By using slow, steady movements, you can achieve smooth edges and detailed shapes without causing damage to the paneling.
What Mistakes Are Common When Using Saws on Paneling?
Common mistakes when using saws on paneling include:
- Using the Wrong Blade: Selecting a blade not suited for the material can lead to rough cuts and splintering. For paneling, a fine-toothed blade specifically designed for wood is ideal to ensure clean edges and reduce damage.
- Inadequate Support: Failing to properly support the paneling while cutting can cause the material to bend or warp, leading to inaccurate cuts. Using sawhorses or a stable work surface helps maintain the integrity of the panel during the cutting process.
- Not Measuring Twice: Skipping precise measurements can result in panels that are cut too short or uneven. It’s crucial to measure and mark your cuts accurately to avoid wasting material and ensure a proper fit during installation.
- Cutting Too Quickly: Rushing through the cutting process often leads to mistakes and poor quality cuts. Taking your time to guide the saw steadily through the paneling will yield better results and reduce the likelihood of splitting or chipping.
- Ignoring Safety Precautions: Neglecting safety gear and precautions can lead to serious injuries. Always wear safety glasses, gloves, and a dust mask, and ensure that the area is clear of hazards before operating any saw.
How Can Miscalculation Impact Your Panel Cutting Efforts?
Miscalculation during panel cutting can lead to significant issues that affect the quality of the project and waste materials. Here are some of the key impacts:
-
Incorrect Measurements: Miscalculating the dimensions can result in panels that are either too short or too long. This discrepancy not only disrupts the design flow but can also necessitate additional purchases and labor.
-
Wasted Materials: Poor calculations may require recutting or replacing panels, leading to increased costs. For instance, if a panel is cut incorrectly, it may need to be discarded, contributing to unnecessary waste.
-
Time Delays: Frequent errors in cutting can slow down the project timeline. Each mistake demands time to rectify, which can postpone finishing dates and increase labor costs.
-
Structural Issues: Inaccurate cuts may lead to misaligned paneling, causing gaps and uneven surfaces. This not only detracts from the aesthetics but can also compromise the integrity of the installation.
To mitigate these risks, it’s crucial to take precise measurements and double-check calculations before cutting. Using reliable tools, such as a good-quality circular saw or table saw, can also help ensure accuracy and efficiency in panel cutting endeavors.
Why Is It Critical to Understand Your Saw’s Limitations?
The underlying mechanism involves the relationship between the saw’s design, blade type, and material being cut. Different saws are engineered for specific tasks, and using an inappropriate tool can lead to excessive strain on the motor or blade, causing overheating or even mechanical failure. For instance, a table saw may provide clean, straight cuts on larger sheets of paneling, while a circular saw may be better suited for smaller, detailed work. When users fail to recognize these distinctions, they not only jeopardize the quality of the cut but also their safety, as ineffective cutting can lead to kickback or tool malfunctions.
Furthermore, understanding the limitations of your saw aids in effective project planning. It allows a woodworker to choose the right tool for the task, thereby optimizing efficiency and minimizing waste. For instance, if a user attempts to cut thick paneling with a saw designed for thinner materials, they may experience binding or excessive wear on the blade, leading to increased costs and time delays. Such knowledge ultimately ensures that projects are completed successfully while maintaining both safety and quality standards.
Related Post: