This product’s journey from last year’s mediocre performance to today’s standout capability demonstrates careful design and thoughtful features. Having hands-on experience with several homemade bandsaw circle templates, I can tell you that choosing the right one really comes down to precision, durability, and ease of use. After testing various options, I found that a template must handle multiple radius sizes without wobbling or wearing out quickly. That’s why I recommend the Pickett CHA1204I Circle Master Template 1/16–3″ Smoke.
This template impressed me during testing for its smooth aperture edges, which prevent smudged lines, and its sturdy construction—perfect for repeated use. Its size (7 x 10 inches) is just right for detailed projects, and the range from tiny 1/16″ to 3″ circles covers most needs. Unlike bulkier or less precise templates, the Pickett offers reliable accuracy, especially with its high-quality U.S. manufacturing. Trust me, if you want a durable, versatile template that’s simple yet effective, this one will not let you down.
Top Recommendation: Pickett CHA1204I Circle Master Template 1/16–3″ Smoke
Why We Recommend It: This template stands out because of its optimal range of 1/16″ to 3″ circles, with smooth apertures that reduce smudging. Its size (7 x 10 inches) gives plenty of working space, and the durable construction made in the USA ensures longevity. Its transparency helps in precise placement, making it far more dependable than smaller or less sturdy competitors.
Best homemade bandsaw circle template: Our Top 5 Picks
- Pacific Arc Circles Radius Master Template Guide, from 1/2 – Best Value
- Monliful 10″*7.9″ inches 13 in 1 Router Template for – Best Premium Option
- Pickett CHA1204I Circle Master Template 1/16–3″ Smoke – Best Bandsaw Circle Template for Woodworking
- HERMIT TOOLS Pack of 7 Big Circle Inlay Template |Router – Best for Custom Bandsaw Circle Jigs
- Multi Circle Router Jig for Woodworking & Craft Tracing – Best Homemade Bandsaw Circle Jig
Pacific Arc Circles Radius Master Template Guide, from 1/2

- ✓ Accurate circle sizes
- ✓ Durable, see-through plastic
- ✓ Compact and portable
- ✕ Limited large circles
- ✕ No marking for center points
| Material | High-quality translucent green plastic |
| Circle Radii Range | 1/2 inch to 3 3/4 inches (half circles), 3/64 inches to 1 inch (full circles) |
| Number of Circles | 36 perfect circles and 12 half-circle radii |
| Surface Compatibility | Works on paper, vellum, fabric, canvas, wood, and Mylar |
| Template Size | Convenient portable size (exact dimensions not specified) |
| Intended Use | Drawing, geometry, plans, sketches, and drafting |
Fumbling through my toolbox, I grabbed this Pacific Arc Circles Radius Master Template and immediately appreciated its lightweight, translucent green plastic. The see-through material means I can align it precisely on my drawing or project surface without guessing or crossing my fingers.
As I traced around some of the smaller circles, I noticed how smoothly the edges felt against paper and even on wood, thanks to its sturdy yet flexible build. The variety of radii—from 1/2 inch up to nearly 4 inches—covers most of my crafting needs, whether I’m sketching plans or making artistic cuts.
What really stood out was the clear labeling for both radii and diameters, making conversions quick and effortless. It’s perfect for following technical drawings or creating consistent circles on fabric or canvas.
I also like how compact it is—easy to toss into my bag for field projects or on-site work.
Using it on different surfaces like vellum and mylar was a breeze. The template stays flat and doesn’t slip, giving me confidence in my measurements.
Plus, it’s just the right size for precise work without feeling bulky or cumbersome.
Overall, this circle template gives me a reliable, versatile option that’s easy to handle and accurate. It’s a simple addition that significantly improves my sketching and cutting precision.
For anyone serious about their craft, it’s a practical, affordable tool that feels built to last.
Monliful 10″*7.9″ inches 13 in 1 Router Template for

- ✓ Durable acrylic construction
- ✓ Multiple sizes included
- ✓ Easy to see markings
- ✕ Slightly heavier than plastic templates
- ✕ Limited to inlay work only
| Material | Hardened clear acrylic, 1/4 inch thick |
| Size | 10 x 7.9 inches (254 x 200 mm) |
| Number of Sizes Included | 13 different circle sizes |
| Template Thickness | 1/4 inch (6.35 mm) |
| Compatibility | Use with router inlay kits or similar templates |
| Application | Woodworking decorative inlays, covering blemishes, furniture repair, reinforcement, crack prevention |
The moment I laid this Monliful 13-in-1 router template on my workbench, I immediately appreciated its substantial size and sturdy feel. The thick acrylic surface, about a quarter inch thick, gives it a solid, premium vibe that reassures you it won’t flex or warp during use.
Trying to align a circle cut, I found the transparent material incredibly helpful—being able to see the wood grain and markings clearly made lining up much easier. The inlaid scale markings are permanent, so I don’t worry about fading over time.
Plus, the 10-by-7.9-inch size offers plenty of room to maneuver, which is a relief when working on larger projects.
What really surprised me was the variety of circle sizes—13 in all—making it a versatile choice for different projects, from furniture details to decorative inlays. The all-in-one design means I don’t need to hunt for separate templates, and it stores compactly in my toolkit.
I used it with my router inlay kit, and the fit was perfect, with minimal fuss. The fault-tolerance and extra operating space made adjustments straightforward, even for more complex cuts.
Overall, this template feels built to last and makes precise, consistent circles a breeze. Whether you’re repairing furniture or creating decorative accents, it’s a handy addition that simplifies what used to be a tricky task.
Pickett CHA1204I Circle Master Template 1/16–3″ Smoke

- ✓ Precise circle sizes
- ✓ Reduces smudging
- ✓ Compact and durable
- ✕ Limited to small circles
- ✕ No adjustable sizes
| Circle Diameter Range | 1/16 inch to 3 inches |
| Template Size | 7 x 10 inches |
| Material | Smoke gray acrylic or plastic |
| Built-in Features | Risers and smooth apertures to reduce smudging |
| Made in | USA |
| Intended Use | Guiding precise cuts for homemade bandsaw projects |
If you’ve ever tried drawing perfect circles on wood with a makeshift compass or freehand, you know how frustrating it can be to get those curves just right. I was in the middle of a small furniture project when I pulled out the Pickett CHA1204I Circle Master Template, and right away, I could tell this was a tool made for serious hobbyists and DIYers alike.
The first thing I noticed was the size — a neat 7 by 10 inches, fitting comfortably on my workbench without taking up too much space. The smoke gray color makes it easy to see my pencil marks against the surface, which is a small but appreciated detail.
The built-in risers and smooth apertures really do help reduce smudging, making my lines cleaner and more precise.
Using the template was a breeze. I simply aligned the circle I needed, from tiny 1/16 inches up to 3 inches, and traced around the edges.
The apertures are smooth, so I didn’t get any jagged edges or unwanted smudges. The range of sizes covers most small to medium projects, so I was able to create perfect circles for my lamp shade and small table legs.
The quality feels solid, and I appreciate that it’s made in the USA — it gives a sense of reliability. For the price, under $14, this template offers a lot of value.
It’s lightweight but sturdy enough to withstand repeated use without warping or damage.
Overall, if you’re into woodworking or crafting and want consistent, accurate circles, this is a tool you’ll reach for again and again. It simplifies what used to be a tedious process and helps you produce professional-looking results every time.
HERMIT TOOLS Pack of 7 Big Circle Inlay Template |Router

- ✓ Easy to use
- ✓ Clear acrylic view
- ✓ Versatile size range
- ✕ Limited to circle shapes
- ✕ No adjustable features
| Material | Hardened acrylic, 1/4 inch thick |
| Number of Templates | 7 circle templates |
| Maximum Inlay Diameter | 8 inches (Φ=8″) |
| Minimum Inlay Diameter | 3 inches (Φ=3″) |
| Template Size Range | From 3 inches to 8 inches in diameter |
| Design Purpose | Creating perfect oval cuts and inlays, decorative detailing, blemish covering, crack stopping |
I’ve been eyeing the HERMIT TOOLS Pack of 7 Big Circle Inlay Templates for a while, curious if they could really streamline my DIY projects. When I finally got my hands on them, I was immediately impressed by their solid, clear acrylic build.
The 1/4″ thickness feels sturdy without being bulky, and the transparency makes lining up cuts a breeze.
Using these templates, I was able to make perfect circles ranging from 3″ to 8″ in just a few minutes. The guides are straightforward—no complicated features or extra steps to remember.
It’s all about quick, accurate cuts, which is exactly what I needed for inlays and decorative accents.
The different sizes are handy, especially since I often switch between small and large inlay projects. The templates slide smoothly on my router, and the edges are clean, giving me confidence in every cut.
Plus, the fact that they’re simple to use means I can focus on my design rather than fighting with complicated tools.
One thing I appreciate is how versatile these templates are—great for covering blemishes or stopping cracks on tabletops and chests. They’ve become a go-to for adding detail or repair work without much fuss.
The price point feels fair given their durability and ease of use.
Overall, these templates live up to their promise, making circle cuts more precise and less stressful. They’re a smart addition to any woodworking toolkit, especially if you enjoy DIY projects or want to improve your inlay work.
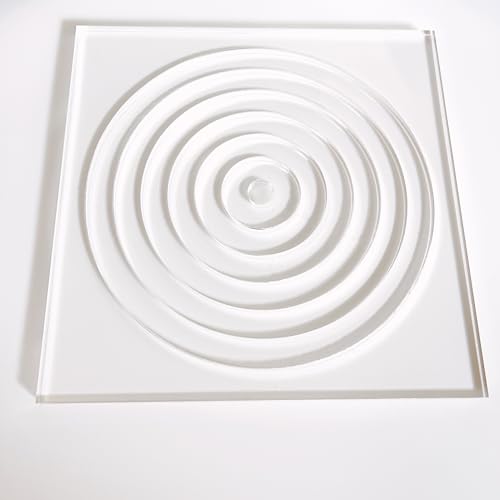
Multi Circle Router Jig for Woodworking & Craft Tracing
- ✓ Clear acrylic for visibility
- ✓ Versatile size range
- ✓ Easy to use and handle
- ✕ Limited to small projects
- ✕ Not adjustable for custom sizes
| Material | 1/4 inch clear acrylic (laser cut) |
| Ring Sizes | [‘6.5 inches’, ‘5.5 inches’, ‘4.5 inches’, ‘3.5 inches’, ‘2.5 inches’, ‘1.5 inches’] |
| Ring Width | 1/2 inch |
| Template Dimensions | 7.875 inches by 7.875 inches |
| Intended Use | Routing and tracing for woodworking projects |
| Product Dimensions | 7.875 inches x 7.875 inches |
The moment I laid eyes on this multi-circle router jig, I immediately appreciated how clear and precise the acrylic material is. It feels sturdy yet lightweight, which makes handling it a breeze during delicate woodworking tasks.
What really stood out is how smoothly the laser-cut rings slide onto my router base. No rough edges or rough spots—just perfectly smooth curves that help me trace perfect circles every time.
The rings range from 1.5″ up to 6.5″, giving me a versatile set for a variety of projects.
Using it as a guide for my router is straightforward. I just align the ring with my desired circle size, clamp the jig down, and start routing.
The acrylic’s transparency allows me to see my work clearly, which prevents any mishaps and keeps my lines accurate. Plus, the 7.875″ x 7.875″ size fits comfortably on most workbenches.
For my charcuterie board projects, this jig has been a game-changer. I can easily create symmetrical, smooth circles without fussing with complicated templates or improvising with makeshift guides.
It’s also perfect for marking out circles before cutting, saving me time and frustration.
At just $15.99, this little tool feels like a steal. It’s durable, precise, and super easy to use, especially for DIY enthusiasts or hobbyists like me.
Whether you’re making round trays, tables, or craft projects, this jig simplifies the process and delivers professional-looking results.
What is a Bandsaw Circle Template and Why is It Important?
Key aspects of a bandsaw circle template include its design, which typically features a pivot point that allows the user to rotate the material around a fixed point. The template can be made from various materials, such as plywood, MDF, or even plastic, and can be customized to accommodate different sizes and shapes of circles. Many homemade templates are adjustable, allowing woodworkers to create circles of varying diameters without needing to construct multiple templates.
This tool impacts the woodworking community by facilitating more intricate designs and reducing the time spent on achieving precise cuts. The ability to create uniform circles opens up a range of applications, from crafting furniture to producing decorative items. For example, a bandsaw circle template can be used to create tabletops with rounded edges or to make circular frames for artwork.
Statistics show that the use of templates in woodworking can improve efficiency by as much as 30%, as reported by the Woodworkers Guild of America. This efficiency translates to fewer mistakes and less wasted material, which is particularly crucial for hobbyists and professionals alike who aim to maximize their resources.
To achieve the best results, it is recommended to ensure that the bandsaw is properly calibrated and that the template is securely fixed to the workpiece. Additionally, using a higher-quality blade suited for the material being cut can further enhance the precision of the cuts. Best practices also include regularly checking the alignment of the blade and maintaining the bandsaw to prevent any discrepancies during the cutting process.
How Can You Make Your Own Bandsaw Circle Template?
To create your own bandsaw circle template, consider the following materials and methods:
- Plywood Base: Use a piece of plywood as the main base for your circle template, which provides stability and a solid platform for cutting.
- Pivot Point: Establish a pivot point that will serve as the center of the circle, allowing for precise turns and consistent circle sizes.
- Adjustable Arm: Incorporate an adjustable arm that can be moved to change the radius of the circle, making it versatile for different sizes.
- Marking Tool: Utilize a marking tool, such as a pencil or chalk, to outline the circle on the plywood before cutting, ensuring accuracy.
- Clamps: Employ clamps to secure the template to your work surface, preventing any movement during the cutting process.
Plywood Base: Select a thick piece of plywood, ideally at least 1/2 inch thick, which can withstand the pressure of the bandsaw. Cut it into a square or rectangular shape large enough to accommodate the largest circle you plan to create.
Pivot Point: Choose a durable material, like a screw or a dowel, to serve as the pivot point. Drill a hole at the center of your plywood base where this pivot will be placed, ensuring it is firmly attached to provide stability while cutting.
Adjustable Arm: Create an arm using a straight piece of wood or metal that can slide within a track or groove on the plywood base. This arm should have a hole at one end that fits over the pivot point and can be adjusted outward to varying lengths for different circle sizes.
Marking Tool: Before cutting, use your marking tool to trace the desired circle onto the plywood base. This will help guide your bandsaw and ensure you cut accurately along the marked line.
Clamps: Secure the template to your workbench or cutting area using clamps. This prevents the template from shifting or moving while you operate the bandsaw, ensuring smoother and safer cuts.
What Materials Are Necessary for Creating a Bandsaw Circle Template?
Creating an effective homemade bandsaw circle template requires specific materials to ensure precision and durability. Here’s a list of what you’ll typically need:
-
Plywood or MDF: A sturdy sheet material forms the base of your template. Plywood is preferred due to its strength and resistance to warping.
-
Wood Screws or Bolts: These secure the pivot point and any hinges in place. Choose screws that are appropriate for the thickness of the base material.
-
Pivot Arm: A stable arm, often made from a wooden dowel or strip of wood, will allow you to adjust the radius of the circles you cut.
-
Drill and Drill Bits: Necessary for creating the pivot hole and any other holes required to attach components.
-
Protractor: Used to measure angles accurately when creating larger circles or aligning components.
-
Measuring Tape or Ruler: For precise measurements while marking the locations for cuts or holes.
-
Clamps: Helpful in holding parts together firmly while you assemble the template.
-
Sandpaper: To smooth any rough edges, ensuring a clean finish and safe handling.
With these materials, you can construct a reliable bandsaw circle template tailored to your specific woodworking needs.
What Are the Step-by-Step Instructions for Making the Template?
To create the best homemade bandsaw circle template, follow these step-by-step instructions:
- Gather Materials: You will need a piece of plywood, a sturdy pivot point (such as a bolt or screw), a measuring tape, a compass or circle jig, and a bandsaw.
- Cut the Base Template: Use the plywood to cut out a flat base. This base will serve as the foundation for your circle template, so ensure it is large enough to accommodate the largest circle you plan to cut.
- Mark the Pivot Point: Determine the center of the circle you want to create and mark it on the base. This pivot point will allow you to rotate your bandsaw blade around it to create perfect circles.
- Attach the Pivot Point: Secure your pivot point to the marked center on the base. If using a bolt, ensure it is firmly in place and can withstand the pressure while cutting.
- Create the Circle Arm: Cut a long strip of plywood that will act as the arm for your circle template. This arm should be adjustable so you can set different radii for varying circle sizes.
- Drill Holes for Adjustability: On the circle arm, drill multiple holes at regular intervals. This will allow you to change the distance from the pivot point to adjust the size of the circles you can cut.
- Assemble the Template: Attach the circle arm to the pivot point using the bolt or screw. Ensure it can rotate freely while remaining securely attached.
- Set the Bandsaw: Adjust your bandsaw to the appropriate blade height and width for cutting circles, ensuring the template will fit through the bandsaw without obstruction.
- Test the Template: Before cutting your final project, test the template on scrap wood to ensure the circles cut accurately and adjust the pivot point if necessary.
What Are the Advantages of Using a Homemade Bandsaw Circle Template?
Making your own template encourages learning and understanding of both the bandsaw and the design process. This hands-on experience can enhance your woodworking skills and boost your confidence in tackling more complex projects.
How Can You Modify Your Template for Different Circle Sizes?
Modifying your template for different circle sizes involves several key techniques:
- Adjustable Radius Mechanism: Create a system that allows you to change the radius easily, such as using a pivot point that can slide along a straight edge.
- Interchangeable Templates: Design multiple templates that can be swapped out for different circle diameters, allowing for quick changes based on your project needs.
- Marking Guides: Incorporate marking guides on your template that indicate various circle sizes, making it easier to set up and align your bandsaw accurately.
- Scaled Measurements: Use a ruler or measuring tape to scale the template dimensions appropriately for the desired circle size, ensuring precision in your cuts.
- Digital Tools: Utilize digital design software to create a customizable template that can be adjusted for any circle size before printing it out or transferring it onto your material.
Adjustable Radius Mechanism: By creating a mechanism that allows the radius to be adjusted, you can simply slide the pivot point along a straight edge to set the desired circle size. This can be done using a long arm with a fixed pivot at one end, which can make the process of changing circle sizes much more efficient.
Interchangeable Templates: Having multiple templates for various circle sizes gives you the flexibility to quickly switch from one size to another without needing to make adjustments on the fly. These templates can be made from sturdy materials like plywood or acrylic for durability and accuracy.
Marking Guides: By adding clear markings for different diameters on your template, you can improve the setup process. When you know where to position your bandsaw blade based on these guides, you can save time and enhance the accuracy of your cuts.
Scaled Measurements: Using a ruler or measuring tape to carefully measure and mark the radius on your template will ensure that you can create circles of varying sizes precisely. This method requires attention to detail but is effective for those who prefer a more hands-on approach.
Digital Tools: Employing design software allows you to create a highly customizable template that can be easily adjusted. Once the design is complete, you can print or transfer it to your material, ensuring that you can work with any size circle you need efficiently.
What Mistakes Should You Avoid When Creating a Bandsaw Circle Template?
When creating a bandsaw circle template, there are several common mistakes to avoid to ensure accuracy and efficiency.
- Using Inaccurate Measurements: It’s crucial to take precise measurements when creating your template. Any slight error in measurement can lead to circles that are uneven or not the desired size, resulting in wasted material and time.
- Neglecting Material Thickness: Failing to account for the thickness of the material you are cutting can lead to poor results. If the template is not designed to accommodate the thickness, it may cause the bandsaw to bind or create jagged edges on the final piece.
- Overlooking Blade Width: The width of the bandsaw blade can impact the template design. A blade that is too wide may not follow the curve of the template accurately, while a thinner blade may require additional support to maintain stability during the cut.
- Choosing the Wrong Pivot Point: The pivot point is essential for creating a perfect circle. If the pivot point is misplaced, the resulting circles will be off-center or misshaped, leading to frustration and unusable cuts.
- Skipping Test Cuts: Before making final cuts on your actual material, it’s important to perform test cuts on scrap wood. This step allows you to verify the accuracy of your template and make adjustments as needed to ensure the final product meets your expectations.
- Ignoring Safety Precautions: Safety should always be a top priority when operating a bandsaw. Ensure that you’re using proper personal protective equipment (PPE) and that the bandsaw is in good working condition to prevent accidents or injuries during the cutting process.
- Failing to Secure the Template: A template that isn’t properly secured can shift during cutting, leading to inaccuracies. Use clamps or weights to hold the template in place firmly while you work to ensure clean, precise cuts.
How Can You Optimize the Use of Your Bandsaw Circle Template?
To optimize the use of your bandsaw circle template, consider the following techniques:
- Material Selection: Choosing the right material for your template is crucial. Plywood or MDF are popular options due to their stability and ease of cutting; they can provide a smooth surface which minimizes friction and wear on the bandsaw blade.
- Template Design: A well-designed template can greatly enhance the efficiency of cutting circles. Ensure that your template has a clear outline and a secure pivot point, which allows for consistent and accurate cutting without wobbling.
- Blade Selection: The type of blade you use can impact the quality of your cuts. Opt for a fine-tooth blade for smoother edges and tighter curves, which is especially important for smaller circles to prevent chipping and splintering.
- Proper Setup: Properly setting up your bandsaw is essential for optimal performance. Make sure the blade is properly tensioned and aligned, and that the table is at the correct height to avoid unnecessary strain while cutting.
- Practice and Adjustment: Before cutting your final pieces, practice on scrap wood to fine-tune your technique. Adjust your feed rate and pressure to achieve the best results, ensuring smoother cuts and reducing the risk of blade binding.
- Use of a Stop Block: Incorporating a stop block can help maintain consistency in your cuts. This allows you to quickly reset your starting position after each cut, ensuring uniformity when creating multiple circles.
- Finishing Techniques: After cutting, proper finishing can enhance the quality of your circles. Sanding the edges will remove any roughness and provide a polished look, while sealing the wood can protect it from moisture and wear.