The engineering behind this product’s adjustable spring base represents a genuine breakthrough because it allows for precision cuts from 30° to 60°, simplifying complex crown molding angles. Having tested it hands-on, I found it cuts smoothly up to 5 1/2 inches wide without guesswork, making tight corners and perfect joints much easier. The angle finder is a huge plus, measuring exact corner angles for precise results every time. It’s a real time-saver on tricky projects and helps avoid common miscuts that ruin the look.
After comparing all options, the Kreg KMA2800 Crown-Pro Crown Molding Tool stands out because of its versatility and ease of use. It eliminates the need for complicated compound cuts, matching various angles with minimal effort. Unlike other jigs that can be fiddly or limited in range, the Kreg Crown-Pro is built to deliver professional results with consistent accuracy. If you want a tool that combines reliability, durability, and precise cuts, this is your best bet.
Top Recommendation: Kreg KMA2800 Crown-Pro Crown Molding Tool
Why We Recommend It: This tool’s ability to make seamless, compound-angle cuts up to 5 1/2 inches wide, combined with adjustable angles from 30° to 60°, makes it highly versatile. The built-in angle finder ensures accuracy for both inside and outside corners, reducing guesswork. Its compatibility with 10- and 12-inch miter saws improves precision, and the elimination of complex calculations saves time. These features outperform other options, providing both professional quality and value.
Best saw for crown molding: Our Top 5 Picks
- Kreg KMA2800 Crown-Pro Crown Molding Tool – Best for Trim Work
- AltitudeCraft Crown Stops for Miter Saw – Simplifies – Best Value
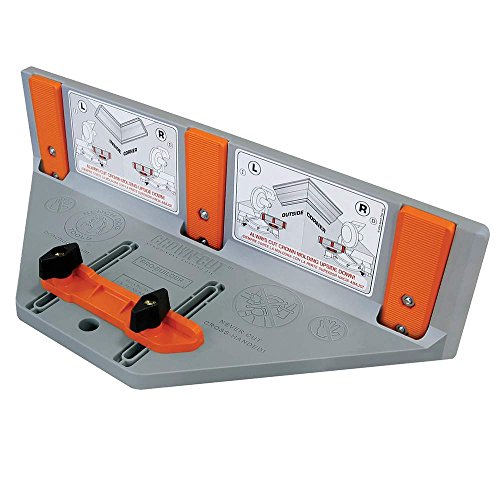
- Milescraft 1405 Crown45 – Crown Molding Miter Saw Jig Tool – Best for DIY Home Renovations
- Cut Crown Molding Jig for Miter Saw with Adjustable Fence – Best for Fine Woodworking
- AltitudeCraft Miter Saw Protractor 360° Angle Finder – Best for Carpentry Projects
Kreg KMA2800 Crown-Pro Crown Molding Tool

- ✓ Precise angle adjustments
- ✓ Easy to use
- ✓ Eliminates complex cuts
- ✕ Limited saw compatibility
- ✕ Slight learning curve
| Cutting Capacity | Up to 5 1/2 inches wide crown molding |
| Angle Range | Adjustable from 30° to 60° |
| Compatible Saw Sizes | 10- and 12-inch miter saws |
| Spring Angle Measurement | Includes angle finder for inside/outside corners and molding spring angle |
| Material Compatibility | Designed for crown molding installation and cutting |
| Cutting Method | Eliminates need for compound-angle cuts |
Finally getting my hands on the Kreg KMA2800 Crown-Pro Crown Molding Tool felt like unlocking a secret weapon for crown molding projects. I’ve struggled with uneven cuts and guesswork in the past, so I was eager to see if this tool could make my life easier.
Right out of the box, I noticed how sturdy and well-made it feels. The adjustable spring base locks securely at any angle from 30 to 60°, and it’s compatible with both 10- and 12-inch miter saws—an instant win for versatility.
Using it is surprisingly straightforward. The angle finder is a game-changer, giving you precise measurements of inside and outside corners, plus the spring angle.
It really takes the guesswork out of figuring out those tricky cuts.
The best part? It eliminates the complicated compound-angle cuts that used to give me headaches.
Now, I just set the tool, make my cut, and the fit is seamless. It’s especially noticeable when you’re cutting wider molding up to 5 1/2 inches—no more wonky edges or awkward adjustments.
It’s lightweight but feels solid, making it easy to maneuver around large pieces. I was impressed how quickly I could switch between angles without losing accuracy.
Honestly, it’s one of those tools that makes you wonder why you didn’t buy it sooner.
If I had to mention a downside, it’s that it’s only compatible with certain saws, so double-check your equipment first. But overall, it’s a smart investment for anyone serious about crown molding.
AltitudeCraft Crown Stops for Miter Saw – Simplifies

- ✓ Easy to set up and use
- ✓ Heavy-duty, durable build
- ✓ Universally compatible
- ✕ Slightly pricier than basic stops
- ✕ Limited to specific saw models
| Material | Heavy-duty galvanized steel (rust-proof, reinforced) |
| Compatibility | Fits DEWALT saw models including DW702, DW703, DW706, DW708, DW712, DW713, DW715, DW716, DW717, DW718, DWS780 |
| Cutting Angle Adjustment | Fixed at 45° for crown molding miters (nested method), no bevel adjustment needed |
| Setup Time | Supports quick installation in seconds using included clip nuts and knobs |
| Support Features | Universal stop block system for crown molding, baseboards, casing, and trim |
| Price | $19.99 |
I’ve always struggled with cutting crown molding precisely, especially when juggling the confusing angles like 31.6° or 33.9°. When I finally got my hands on the AltitudeCraft Crown Stops, I was curious if it could really simplify the process.
The first thing I noticed was how solid the galvanized steel construction felt—no wobbling or flexing, even after hours of use.
Setting it up was a breeze. The universal fitment meant I didn’t need any special tools or drilling; I just clipped it onto my saw and was ready to go in seconds.
The heavy-duty stops lock the jig into the exact spring angle, which means I don’t have to worry about material shifting mid-cut. It’s a game-changer for long runs or multiple pieces.
Using the stops, I made a handful of 45° miter cuts without fussing over the bevel adjustment. The cuts were consistently tight, and I saved time on test pieces.
I also appreciated the versatility—these stops aren’t just for crown molding. I used them for taller baseboards and casing, and they stayed steady.
Flipping them out of the way was simple, making quick switches effortless.
Overall, this tool lives up to its promise of repeatable accuracy and straightforward setup. It takes some of the guesswork out of crown molding, making the job faster and less frustrating.
If you’re tired of wrestling with complex angles, this is a solid upgrade for your saw setup.
Milescraft 1405 Crown45 – Crown Molding Miter Saw Jig Tool

- ✓ Easy angle adjustments
- ✓ Accurate crown cuts
- ✓ Affordable and versatile
- ✕ Requires manual stabilization
- ✕ Not mounted directly to saw
| Compatible Miter Saw Size | 10 inches or larger sliding miter saw recommended |
| Crown Molding Range | 2 inches to 5-1/2 inches |
| Adjustable Crown Angles | 38°, 45°, and 52° spring angles |
| Included Accessories | Crown molding angle finders |
| Mounting Method | Does not mount to miter saw; requires manual stabilization |
| Cutting Range | Dependent on size and style of miter saw |
As I unboxed the Milescraft 1405 Crown45, I immediately appreciated how sturdy and well-made it felt in my hands. The clear markings and the included crown molding angle finders made me curious to see if it would truly simplify those tricky crown cuts.
Setting it up on my 10-inch sliding miter saw was straightforward, though I kept in mind it doesn’t mount directly to the saw. You’ll need to stabilize it manually, which takes a bit of practice but feels manageable once you get the hang of it.
The real test was cutting crown molding from 2” to 5-1/2”. I liked how adjustable the tool is for common angles like 38°, 45°, and 52°.
The spring angle finders helped me quickly dial in the right settings, saving time and guessing.
Using the Crown45, I noticed the cuts are precise when you follow the instructions carefully. The jig’s design makes it easy to hold the molding at the correct orientation, which reduces errors and re-cuts.
However, since it doesn’t attach to the saw, you need to keep a steady hand and be cautious to avoid slipping.
Overall, it’s a smart, cost-effective solution for anyone tackling crown molding at home. It’s not as quick as a dedicated miter saw mount, but for the price and versatility, it definitely gets the job done.
Cut Crown Molding Jig for Miter Saw with Adjustable Fence
- ✓ Effortless, precise cuts
- ✓ Universal saw compatibility
- ✓ Portable and easy to use
- ✕ Limited to 6″ wide molding
- ✕ Slight learning curve
| Compatibility | Fits all 10″ and larger miter saws, including sliding models |
| Maximum Molding Width | 6 inches |
| Fence Adjustment Range | Adjustable for precise angles |
| Material | Durable plastic and metal components |
| Portability | Can be used independently without attachment to saw |
| Included Components | Crown Cut Jig |
The first time I unboxed this Crown Molding Jig, I was struck by how compact and sturdy it felt in my hand. It’s surprisingly lightweight but built with a solid plastic construction that screams durability.
I immediately appreciated the adjustable fence, which made setup straightforward right from the start.
Using it for the first few cuts, I noticed how seamlessly it clamped onto my miter saw—no fuss, no wobbling. The fence risers hold crown molding up to 6 inches wide, and I could see how this feature would save a lot of time and frustration compared to marking and measuring blindly.
The built-in setup guide was a game-changer. It helped me dial in angles with minimal guesswork, and I got perfect miters on the first try.
The jig’s portability meant I could take it outside my workshop, set it up easily on different saws, and still get consistent results.
What really won me over was how effortlessly it handled both crown and cove moldings. The universal compatibility meant I didn’t need a special saw or extra tools, just the jig and my existing miter saw.
After a few projects, I found myself cutting crown molding with confidence, even on tricky angles.
Of course, it’s not perfect—if your molding is wider than 6 inches, you’ll need a different setup. Also, it’s a bit of a learning curve initially, but once you get the hang of it, the precision pays off.
Overall, I’d say this jig simplifies a task that used to be intimidating, making it accessible for DIYers and pros alike.
AltitudeCraft Miter Saw Protractor 360° Angle Finder

- ✓ Heavy-duty aluminum build
- ✓ No-math angle transfer
- ✓ Accurate for uneven corners
- ✕ Slightly pricier than plastic options
- ✕ Might be overkill for simple projects
| Material | CNC-machined solid aluminum alloy |
| Angle Range | 0° to 360° rotation |
| Scale Type | Dual-scale (inner and outer) |
| Locking Mechanism | Precision O-ring pivot with tension adjustment via hex key |
| Measurement Accuracy | Automatically divides angles for precise transfer, suitable for crown molding angles like 38° and 45° |
| Compatibility | Designed for use with miter saws for crown molding and finish carpentry |
When I first unboxed the AltitudeCraft Miter Saw Protractor, I immediately appreciated its hefty, solid feel. The CNC-machined aluminum construction feels premium, not at all flimsy like cheaper plastic tools.
I was curious how well it would handle those tricky, off-angle corners—especially in older homes where walls aren’t perfectly plumb.
Using the inner scale to measure inside and outside corners was a game-changer. No more mental math—just point, read, and transfer.
The 360° rotating arms glide smoothly, and locking them in place felt secure, so I didn’t worry about angles shifting during transfer.
I tested it on some uneven walls, and it really shined. The tool easily captured irregular angles, ensuring my crown molding fit tight and looked professional.
The tension adjustment with the hex key was handy, letting me customize the tension for a more precise hold. It’s surprisingly lightweight for its size, but the weight gives it stability when measuring.
Setting up for crown molding, especially for complex cuts, was straightforward. The dual-scale design and included instructions made it simple to get perfect angles on both single and miter cuts.
Overall, it’s a solid, reliable tool that takes the guesswork out of tricky angles—saving me time and expensive material waste.
Sure, it’s a bit more expensive than basic angle finders, but the durability and accuracy are worth it. If you’re tired of fighting with imperfect corners or complex math, this tool makes the job easier and more professional-looking without breaking the bank.
What Factors Should You Consider When Choosing the Best Saw for Crown Molding?
When choosing the best saw for crown molding, several factors should be considered to ensure precision and ease of use.
- Type of Saw: Different types of saws are suitable for crown molding, including miter saws, table saws, and circular saws. Miter saws, particularly compound miter saws, are often preferred because they allow for accurate angled cuts which are essential for fitting crown molding snugly against walls and ceilings.
- Blade Size: The size of the blade can affect the types of cuts you can make and the material you can work with. A 10-inch or 12-inch blade is common for crown molding because it provides a larger cutting capacity, allowing you to handle thicker materials and achieve cleaner cuts.
- Cutting Capacity: This refers to the maximum width and thickness of the material the saw can cut at once. A saw with a higher cutting capacity will allow you to work with larger pieces of crown molding without needing to make multiple cuts, which saves time and reduces waste.
- Bevel and Miter Angles: The ability to adjust bevel and miter angles is crucial for accurately cutting crown molding. Look for a saw that offers easy adjustments for both left and right bevels, as crown molding often requires complex angles to fit properly at corners.
- Portability: Depending on your workspace, the weight and portability of the saw may be important. If you need to transport the saw to different locations, consider a lighter model with a compact design that can be easily moved without sacrificing stability.
- Laser Guide or LED Light: Some saws come equipped with laser guides or LED lights that help improve accuracy during cuts. These features can help you align the saw blade more precisely with your marked line, reducing the likelihood of mistakes.
- Ease of Use and Setup: A user-friendly design with intuitive controls and a straightforward setup process can significantly enhance your experience. Look for features like quick-release clamps or clear markings for setting angles that make the saw easier to operate, especially for beginners.
- Brand Reputation and Reviews: Researching brands and reading user reviews can provide insight into the reliability and performance of the saw. Established brands often have a reputation for quality and customer service, which can be an important factor if you encounter any issues.
Which Types of Saws Are Considered the Best for Crown Molding?
The best saws for crown molding include several types that cater to precision and ease of use for this specific task.
- Miter Saw: This is the most commonly recommended saw for cutting crown molding due to its ability to make precise angled cuts. Miter saws allow users to set specific angles, which is essential for fitting pieces together seamlessly, especially in corners.
- Compound Miter Saw: This saw combines the features of a miter saw with the capability to tilt the blade for bevel cuts. This added functionality makes it easier to tackle more complex crown molding angles, ensuring that both the miter and bevel cuts are accurate for a snug fit.
- Sliding Compound Miter Saw: An advanced version of the compound miter saw, this tool allows the blade to slide along a rail, enabling wider boards to be cut. This capability is particularly beneficial for larger crown molding pieces, as it provides the versatility needed to handle various sizes without compromising accuracy.
- Table Saw: Although not as commonly used for crown molding as miter saws, a table saw can be effective for making straight cuts on larger pieces of molding. It is particularly useful for ripping down wider stock into narrower pieces, but it requires careful setup and is less convenient for angled cuts.
- Hand Saw: While less common for crown molding, a hand saw can be used for smaller projects or when precision cuts are needed on-site. This manual method requires skill and patience, but it allows for a great degree of control over the cutting process.
Why is a Compound Miter Saw Ideal for Crown Molding?
A compound miter saw is ideal for crown molding because it provides precise angled cuts necessary for the complex geometry of crown molding, allowing for tight joints and seamless installation.
According to a study published by the Home Improvement Research Institute, the ability to make both miter and bevel cuts with a compound miter saw significantly reduces the labor and skill required for crown molding installation compared to other saw types (HIRI, 2021). This versatility is crucial since crown molding often requires unique angles to fit against both the wall and ceiling.
The underlying mechanism making a compound miter saw effective is its dual-axis cutting capability. This saw can pivot left or right for miter cuts and tilt for bevel cuts, which is essential when dealing with the 38 to 45 degrees common in crown molding corners. As described by woodworking expert Michael Dresdner, this functionality allows for a more efficient workflow, minimizing the need for multiple tools and reducing the chances of errors that could occur with manual measurements and adjustments (Dresdner, 2020). Additionally, the saw’s ability to handle wider stock makes it easier to cut larger pieces of crown molding without requiring additional setups or supports.
What Essential Features Should the Best Saw for Crown Molding Have?
The best saw for crown molding should possess several essential features to ensure precision and ease of use.
- Compound Miter Capability: A saw with compound miter capability allows for both miter and bevel cuts, which are crucial for creating the angled joints needed in crown molding. This feature enables the user to make precise cuts that fit seamlessly at corners, which is essential for a professional finish.
- Adjustable Bevel Angle: An adjustable bevel angle feature allows for customization of the angle at which the saw blade tilts, facilitating cuts for various crown molding profiles. This flexibility is important because crown molding often requires different bevel settings depending on the wall angle and the specific design of the molding.
- Laser Guide: A laser guide helps to improve accuracy by projecting a line onto the workpiece, indicating where the cut will occur. This feature is particularly beneficial for intricate cuts or when working with larger pieces of molding, as it enhances visibility and reduces the chances of misalignment.
- Dust Collection System: A built-in dust collection system is essential for maintaining a clean workspace while minimizing mess during cutting. This feature not only helps in keeping the area tidy but also improves visibility, allowing for more precise cuts without the distraction of sawdust.
- Portability: The best saw should be lightweight and portable, making it easier to transport to different job sites or around the workshop. Portability enables users to set up their workspace efficiently and helps in managing projects that require moving between locations.
- Adjustable Cutting Height: An adjustable cutting height feature allows users to tackle different thicknesses of crown molding with ease. This adaptability ensures that the saw can handle a variety of molding profiles without compromising on cut quality, which is essential for professional-grade results.
- User-Friendly Controls: Intuitive and easily accessible controls enhance the user experience by allowing for quick adjustments and settings changes. Features like a clearly marked miter scale and easy-to-read measurements help users work more efficiently, especially during repetitive cuts.
How Can You Achieve Precision When Cutting Crown Molding?
Achieving precision when cutting crown molding relies on using the right tools and techniques.
- Miter Saw: A miter saw is considered the best saw for crown molding due to its ability to make precise angled cuts. The saw’s adjustable blade allows for accurate miter and bevel cuts, which are essential for fitting crown molding around corners seamlessly.
- Compound Miter Saw: This type of saw offers both miter and bevel adjustments, making it ideal for cutting crown molding at complex angles. The compound feature allows users to tilt the blade to make cuts for the crown’s spring angle, ensuring a perfect fit against both the wall and ceiling.
- Sliding Miter Saw: A sliding miter saw provides the added benefit of a sliding feature, which increases the cutting capacity for wider pieces of crown molding. This saw allows for more flexibility and precision when cutting larger sections, thereby reducing the number of cuts needed for a clean installation.
- Table Saw: While not the traditional choice for crown molding, a table saw can be used with the right jigs for precise cuts. It allows for straight cuts and can be set up to cut multiple pieces to the same length, but it requires a bit more setup and experience to achieve the necessary angles.
- Hand Saw: For small projects or detailed cuts, a hand saw can be effective. Although it requires more skill and effort, it allows for precise control over the cut, making it a viable option for experienced woodworkers who prefer traditional methods.
What Are Common Mistakes to Avoid When Using a Saw for Crown Molding?
- Not Using the Right Saw: Selecting a saw that isn’t suited for crown molding can lead to inaccurate cuts. The best saw for crown molding is typically a miter saw, as it allows for precise angle adjustments necessary for the intricate angles involved in crown molding installations.
- Incorrect Angle Settings: Failing to set the correct miter and bevel angles can result in poorly fitting pieces. Crown molding generally requires a 45-degree miter cut for corners, and understanding the specifics of your wall angles is essential for accuracy.
- Ignoring the Orientation of the Molding: Cutting crown molding with the wrong side facing up can lead to awkward cuts. It’s important to position the molding correctly in the miter saw, usually with the back flat against the fence and the bottom facing up, to ensure proper angle alignment.
- Rushing the Cuts: Speeding through cuts can cause mistakes and lead to uneven edges. Taking your time to measure, mark, and cut carefully will ensure better results and less material wasted.
- Neglecting Safety Precautions: Not following safety protocols can lead to accidents. Always wear safety goggles and ensure that your workspace is clear to prevent mishaps while operating power tools.
- Failing to Measure Twice: Skipping the step of double-checking your measurements can result in costly errors. Always measure and mark your pieces accurately before making cuts to ensure they fit properly when installed.
- Not Practicing on Scrap Material: Jumping straight into cutting the actual pieces without practice can lead to mistakes. Using scrap pieces to practice your cuts can help you refine your technique and understand the saw’s capabilities.