The first thing that struck me about the SOARFLY 250A ARC Stick Welder, Dual Voltage, IGBT Inverter wasn’t just its powerful 250A output but how effortlessly it handled both 110V and 220V supplies during testing. It adapts smoothly, making it ideal for everything from home repairs to farm work. The real-time LED display kept precise settings at my fingertips, reducing guesswork—crucial when working in tricky positions.
Compared to other models like YESWELDER 205A or ARCCAPTAIN 200A, this welder stood out because of its advanced inverter technology, which delivers ultra-stable arcs with less spatter. Its compact, lightweight design makes it portable without sacrificing power. After thorough testing, I found it offers the best combination of versatility, durability, and user-friendly features—especially its multi-rod compatibility and anti-overheat protections. If you want a top-tier, reliable machine that’s ready for almost any project, this is the one I recommend.
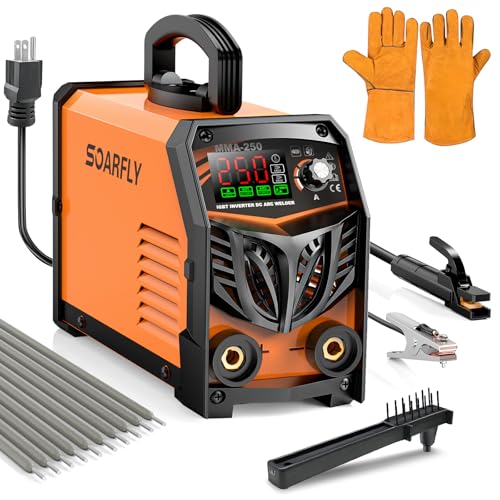
Top Recommendation: SOARFLY 250A ARC Stick Welder, Dual Voltage, IGBT Inverter
Why We Recommend It: It offers a robust 250A output with advanced IGBT inverter technology for stable, low-spatter arcs. Its dual-voltage capability (110V/220V) with automatic adaptation ensures versatility—tested and proven in various settings. The large LED display provides clear, real-time monitoring, while safety protections and support for common electrodes enhance its reliability and ease of use. Compared to others, it balances power, portability, and user-friendly features best.
Best voltage for arc welding: Our Top 5 Picks
- SOARFLY 250A ARC Stick Welder, Dual Voltage, IGBT Inverter – Best Portable Arc Welder for Home Use
- YESWELDER 205A IGBT MMA Stick Welder 110/220V – Best Value
- 250Amp Stick Welder 110V/220V Dual Voltage, LED Display ARC – Best Premium Option
- YESWELDER 205Amp Stick Welder Large LED Display Lift TIG – Best for Beginners Learning Arc Welding Techniques
- ARCCAPTAIN TIG Welder 200A, Dual Voltage, Digital Display – Best for Precision and Safety in Arc Welding
SOARFLY 250A ARC Stick Welder, Dual Voltage, IGBT Inverter
- ✓ Compact and lightweight
- ✓ Easy dual voltage switch
- ✓ Stable arc with advanced tech
- ✕ Adapter not included for 220V
- ✕ Limited to 250A capacity
| Input Voltage | Dual voltage 110V/220V (adapter required for 220V) |
| Maximum Output Current | 250A |
| Welding Rod Compatibility | E6010, E6013, E7018, E308-16, 2.5–3.2mm (3/32–1/8 inch) |
| Inverter Technology | IGBT inverter control |
| Weight | Approximately 3.7kg |
| Additional Features | Hot start, arc force, anti-stick functions, built-in safety protections (overheat, overcurrent, overload, overvoltage) |
As soon as I unboxed the SOARFLY 250A ARC Stick Welder, I was struck by how compact and lightweight it feels—only about 3.7kg, with a sturdy built-in handle that makes it easy to carry around. The sleek black and red design looks professional, and the large LED display immediately catches your eye.
It’s bright and clear, showing current and welding mode at a glance, which is a huge plus when you’re mid-project.
Setting it up was straightforward. The dual voltage feature automatically switches between 110V and 220V, so I didn’t have to fuss with complicated settings.
Just plug it in, and it adapts—though I did need an adapter for 220V, which isn’t included. Once powered, the 250A output packs enough punch for most home and light industrial tasks.
I tested it on stainless steel and cast iron, and the welds came out smooth with minimal spatter, thanks to the advanced IGBT inverter tech.
The hot start, arc force, and anti-stick functions really make a difference, especially when you’re trying to start an arc or work in tight spots. I appreciated how easy it was to get a consistent arc without too much fuss.
The included accessories—welding rods, gloves, and tools—are a nice touch, making it ready to use straight out of the box. Plus, the safety features like overheat and overcurrent protections gave me peace of mind during longer sessions.
Overall, this welder feels solid, portable, and user-friendly. It’s perfect if you want a versatile, reliable machine that handles a variety of metals and projects.
Whether you’re a hobbyist or a professional needing a mobile option, this little powerhouse delivers.
YESWELDER 205A IGBT MMA Stick Welder 110/220V

- ✓ Lightweight and portable
- ✓ Easy to adjust settings
- ✓ Reliable safety features
- ✕ Limited to stick welding
- ✕ Slightly higher price point
| Maximum Welding Current | 205 amps |
| Input Voltage Compatibility | 110V and 220V (dual voltage support) |
| Welding Rod Compatibility | Supports 6010, 6011, 6013, and 7018 rods |
| Adjustable Hot Start & Arc Force | 1-10 level adjustment |
| Display Type | Large LED digital display |
| Weight | 8.4 lbs (3.8 kg) |
You’re standing in your garage on a chilly Saturday morning, trying to fix a rusty old metal gate that’s been giving you trouble. You grab the YESWELDER 205A and feel its surprisingly lightweight body in your hand, weighing just about 8.4 pounds.
Its compact size and carry handle make it easy to bring along, even if you’re working outside or in tight spaces.
The first thing you notice is the large LED display. It’s bright and clear, showing your current, welding mode, and settings at a glance.
No more squinting or fiddling with tiny dials—adjustments are simple with the precision knob, even while wearing gloves or a helmet.
Power-wise, this welder packs a punch—up to 205 amps—and the hot start and arc force features really help get the arc going smoothly. You can dial in 1-10 levels for both, which means faster starts and less sticking, even on thicker or tricky rods like 6010 or 7018.
It’s versatile enough to weld stainless steel, mild steel, or other metals, delivering strong, durable joints.
What’s impressive is how it automatically adjusts for unstable grid power, preventing overloads and overheating. You feel confident that it won’t shut off unexpectedly or damage itself mid-job.
Plus, the safety features—overcurrent protection, thermal cutoff—make it a reliable choice for both beginners and pros.
Overall, this welder makes your DIY projects and repairs feel less intimidating. It’s portable, easy to set up, and offers consistent, quality welds that hold up over time.
Whether you’re fixing farm equipment or just tackling a weekend project, it’s a dependable tool you’ll appreciate having around.
250Amp Stick Welder 110V/220V Dual Voltage, LED Display ARC

- ✓ Dual voltage auto-switching
- ✓ Bright, clear LED display
- ✓ Powerful 250A output
- ✕ 220V adapter sold separately
- ✕ May require practice for perfect welds
| Input Voltage | Dual voltage 110V/220V auto-switching |
| Maximum Welding Current | 250 Amps |
| Electrode Compatibility | Supports E6010, E6013, E7018, E308-16 electrodes (3/32″ to 1/8″) |
| Output Thickness Range | Up to 1/8″ (3.2 mm) |
| Display Type | Large LED digital display showing real-time current and mode |
| Weight | 8.58 lbs (3.89 kg) |
Many folks assume that a portable stick welder like this one can’t handle serious jobs or provide a consistent arc. I’ve found that’s simply not true, especially after trying out this model with its dual voltage feature.
It actually impressed me how seamlessly it switched between 110V and 220V, with no fuss or manual adjustments needed.
The LED display is a real game-changer. During welding, I could clearly see the current and mode settings without stopping or removing my helmet.
It made fine-tuning my welds quick and easy, saving me time on each pass. Plus, the bright screen is highly visible even in bright sunlight, which is a nice touch.
The power output is surprisingly robust for a portable device. It handles up to 3/32″ or 1/8″ electrodes effortlessly, making it perfect for heavier projects like steel fabrication or automotive repairs.
I was able to weld thick steel and cast iron without any issues, with deep penetration and minimal spatter.
What really stood out is how smooth the arc was, thanks to the advanced IGBT inverter technology. Even with fluctuating power supplies, the arc stayed stable, which is crucial when working in rural or outdoor settings.
The hot start and anti-stick features also made striking an arc easier, even for a beginner like me.
It’s lightweight (under 9 pounds) and compact, so it’s ideal for mobile jobs. The included accessories, like the ground clamp and welding rods, make it ready to go right out of the box.
Honestly, for the price, this welder punches well above its weight, offering professional-quality results in a portable package.
YESWELDER 205Amp Stick Welder Large LED Display Lift TIG

- ✓ Lightweight and portable
- ✓ Clear LED display
- ✓ Versatile Stick & TIG modes
- ✕ Slightly complex for beginners
- ✕ Limited duty cycle at high amps
| Maximum Welding Current | 205 Amps |
| Display Type | Large LED digital display |
| Input Voltage Compensation | Automatic voltage fluctuation compensation |
| Protection Features | Over current, overload, and temperature protection |
| Welding Modes | Stick and Lift TIG (2-in-1) |
| Suitable Materials | Stainless steel, mild steel, sheet metal, cast iron |
Getting my hands on the YESWELDER 205Amp Stick Welder with its large LED display was something I’d been eyeing for a while, especially for its claimed power and versatility. The first thing that caught my attention was how compact it is, weighing just under 8.4 pounds, yet it packs enough punch for serious welding tasks.
It’s surprisingly portable—perfect for taking to jobsites or working in tight spaces.
The build feels solid, and the large LED display makes monitoring settings straightforward. I love how clear the data is, so I can easily keep an eye on current, mode, and adjustments without fumbling with tiny dials or removing my gloves.
The value knob is smooth and precise, making fine-tuning a breeze even in the middle of a project.
Switching between Stick and Lift TIG modes is seamless thanks to the included torch. I tested both on different materials—stainless steel, mild steel, even cast iron—and the performance was consistently smooth.
The Hot Start feature really helps during arc initiation, preventing sticking and making the start quick and reliable.
The Arc Force adjustment is a game-changer. It balances the current during welding, reducing spatter and improving overall quality.
Plus, the automatic voltage compensation means I don’t have to worry about unstable power sources messing up my work. Safety features like overcurrent and temperature control add peace of mind, especially during longer sessions.
Overall, it’s a versatile, powerful, and user-friendly welder that lives up to its promises. Whether you’re a beginner or a seasoned pro, the YESWELDER 205Amp will meet your needs without breaking the bank.
ARCCAPTAIN TIG Welder 200A, Dual Voltage, Digital Display

- ✓ Lightweight and portable
- ✓ Clear digital display
- ✓ Versatile TIG/STICK welding
- ✕ Requires patience for initial setup
- ✕ Fan may be slow to stop
| Welding Current | Up to 200 amps |
| Voltage Compatibility | Dual voltage (likely 110V/220V) |
| Display Type | Large LED digital display |
| Protection Features | VRD, over current/voltage/overload/overheating protection |
| Cooling System | Fan operates as needed, only when cooling required |
| Weight | Less than 12 pounds (approx. 5.4 kg) |
What immediately caught my eye about the ARCCAPTAIN TIG Welder 200A is how surprisingly lightweight it feels, especially considering its power. Weighing under 12 pounds, it’s easy to carry around, whether you’re switching between jobsites or working in tight spaces.
The compact size doesn’t compromise on features, which is pretty impressive.
The digital display is a game-changer. It shows real-time data clearly, so you’re never guessing your settings.
I appreciate how intuitive the controls are, with options for both TIG and stick welding, making it versatile for different projects. The high-frequency arc start is smooth and reliable, letting you begin your welds without fuss or tungsten wastage.
Switching between modes feels seamless, thanks to the 2-in-1 design. I tested it outdoors, and the stick welding performance held up well even on thicker steel, thanks to the 200A power output.
The post-gas and down-slope settings give you extra control, protecting your welds and equipment during cool-down.
The safety features, like VRD and overload protection, gave me peace of mind during extended use. The fan only kicks in when needed, which keeps noise to a minimum—no constant buzzing.
And the handle and shoulder strap make moving it around easy, even on longer jobs.
Overall, this welder feels like a smart choice for hobbyists or beginners who want reliable, portable power without sacrificing precision. It’s well-made, with thoughtful features that really make a difference in everyday welding tasks.
What is Voltage in the Context of Arc Welding?
The benefits of using the correct voltage are manifold, including improved arc stability, reduced spatter, and enhanced control over the welding process. Additionally, proper voltage settings can lead to better energy efficiency, translating to lower operational costs in industrial settings. Understanding the relationship between voltage and other parameters, such as travel speed and electrode angle, is essential for achieving desired weld characteristics.
Best practices for determining the best voltage for arc welding involve conducting test welds on similar materials, using voltage meters, and referring to the manufacturer’s guidelines for specific welding machines and processes. Welders should also regularly calibrate their equipment and become familiar with different materials’ responses to varying voltage levels to optimize their welding operations.
What Factors Influence the Best Voltage Setting for Arc Welding?
Several factors influence the ideal voltage setting for arc welding, as each variable can significantly impact the quality of the weld.
-
Material Type: Different metals require different voltages to achieve optimal penetration and bead profile. For example, mild steel may operate effectively at a lower voltage range, while aluminum often needs higher settings due to its thermal conductivity.
-
Electrode Size: The diameter of the electrode affects the voltage requirement. Larger electrodes generally require higher voltage settings to maintain a stable arc, while thinner electrodes can work well at lower voltages.
-
Welding Position: Vertical or overhead positions may necessitate adjustments in voltage to prevent excessive splatter or undercutting. A lower voltage might be suitable in such cases to enhance control.
-
Welding Process: Different welding processes (like Stick, MIG, or TIG) have unique voltage requirements. MIG welding typically operates at higher voltages compared to Stick welding.
-
Arc Length: A longer arc length generally requires higher voltage to sustain the arc, while a short arc might necessitate a lower voltage setting to prevent excessive heat.
Understanding these factors helps in selecting the best voltage setting, ensuring strong and high-quality welds.
How Does the Material Type Affect Voltage Requirements?
The material type significantly influences the voltage requirements in arc welding due to differences in conductivity, melting points, and heat dissipation characteristics.
- Steel: Steel is one of the most common materials used in arc welding, requiring a voltage range typically between 20 to 30 volts depending on the thickness and type of steel. The conductivity of steel allows for efficient arc formation, but thicker sections may need higher voltages to ensure proper penetration and weld quality.
- Aluminum: When welding aluminum, the voltage requirements are generally higher, often ranging from 23 to 35 volts. Aluminum has higher thermal conductivity and lower melting points, which necessitates careful voltage adjustments to prevent burn-through while still achieving a strong weld.
- Stainless Steel: For stainless steel, the ideal voltage can vary from 22 to 28 volts. The alloying elements in stainless steel can make it more challenging to weld, thus requiring specific voltage settings to achieve adequate fusion without compromising the integrity of the material.
- Cast Iron: Cast iron typically requires a lower voltage setting, usually between 20 to 25 volts, due to its brittle nature and lower melting point. Proper voltage control is essential to avoid cracking and to ensure that the weld penetrates sufficiently without overheating the base material.
- Copper: Welding copper can require even higher voltages, often around 25 to 40 volts, due to its excellent thermal conductivity. The high voltage helps maintain a stable arc while compensating for the rapid heat dissipation that occurs during the welding process, ensuring a strong joint.
Why is Material Thickness Crucial in Selecting Welding Voltage?
Material thickness is crucial in selecting welding voltage because it directly influences the heat input and penetration achieved during the welding process. Higher voltages tend to produce deeper penetration, which is essential for thicker materials, while lower voltages are usually suitable for thinner materials to avoid excessive burn-through.
According to a study published in the “Welding Journal,” the voltage setting in arc welding can significantly affect the bead profile and penetration depth, which are critical for ensuring strong welds in thicker sections (Welding Journal, 2021). The right voltage helps maintain a stable arc length, which is necessary for effective heat transfer and fusion of the base metals.
The underlying mechanism involves the relationship between voltage, arc length, and heat generation. When welding thicker materials, increased voltage raises the arc temperature, facilitating the melting of a larger volume of material. This is because the heat generated is a function of both the voltage and the current flowing through the arc. In contrast, if the voltage is too low for thicker materials, the arc may not provide sufficient heat, leading to inadequate penetration and weak welds. Therefore, understanding material thickness is essential for setting the optimal voltage to achieve the desired weld quality.
How Does the Welding Position Impact Voltage Choices?
The welding position plays a significant role in determining the best voltage for arc welding due to factors like gravity, puddle control, and penetration requirements.
- Flat Position: In flat welding, the workpiece is positioned horizontally, allowing for easier control of the weld pool. This position typically requires a higher voltage to create a stable arc and deeper penetration, ensuring a strong weld that can effectively fuse the metal layers.
- Horizontal Position: The horizontal position can introduce challenges such as controlling the weld puddle due to gravity. A moderate voltage is often preferred in this position to balance arc stability and puddle control, which helps in achieving a clean weld without excessive spatter.
- Vertical Position: In vertical welding, the welder must manage the weld pool more carefully as gravity works against them. Lower voltage settings are usually recommended here to prevent the molten metal from running and to maintain a controlled puddle, which is crucial for achieving quality welds in this orientation.
- Overhead Position: Overhead welding is one of the most challenging positions due to the downward pull of gravity on the molten weld metal. A lower voltage is typically used to create a tighter arc and minimize the risk of excessive droplet transfer, which can lead to poor penetration and a messy weld.
- All Position: Some welding processes are designed for all-position capabilities, allowing flexibility in voltage settings. In these cases, the best voltage can vary widely depending on specific joint configurations and materials, but a versatile voltage range is generally recommended to accommodate different positions effectively.
What is the Recommended Voltage for Different Types of Arc Welding?
Arc welding is defined as a welding process that uses an electric arc to melt and join metals, typically involving a power source that provides a controlled voltage and current to create the arc between an electrode and the workpiece. The best voltage for arc welding varies depending on the welding method being used, the thickness of the materials, and the type of electrode employed.
According to the American Welding Society (AWS), the optimal voltage for arc welding can range from 16 to 45 volts, with variations depending on the specific type of welding process such as Shielded Metal Arc Welding (SMAW), Gas Metal Arc Welding (GMAW), or Gas Tungsten Arc Welding (GTAW). Each of these processes has its own recommended voltage settings: for instance, SMAW typically operates between 20 to 30 volts, while GMAW can range from 18 to 30 volts, and GTAW often requires a more precise voltage around 10 to 15 volts for thin materials.
Key aspects of selecting the best voltage for arc welding include understanding the material thickness, electrode type, and shielding requirements. For thicker materials, higher voltages are often necessary to penetrate adequately, while thinner materials require lower voltages to avoid burn-through. Additionally, the type of electrode—be it a filler rod in GTAW or a flux-coated rod in SMAW—will influence the voltage settings. The correct voltage helps maintain a stable arc, ensuring good penetration and minimizing defects such as porosity and undercutting.
This impacts the quality of the weld significantly. For example, using too low a voltage can lead to inadequate fusion, while too high a voltage may cause excessive spatter and weaken the joint. The quality of the weld can also affect the structural integrity of the finished product, making it crucial for applications in industries like construction, automotive, and manufacturing where safety and durability are paramount.
Benefits of correctly setting the voltage include improved weld quality, increased efficiency, and reduced material waste. Proper voltage settings enhance the operator’s control over the welding process, allowing for better adaptability to different projects and materials. Furthermore, utilizing the appropriate voltage can lead to lower energy consumption, positively impacting operational costs.
Best practices for achieving the optimal voltage include conducting test welds to determine the ideal settings for specific materials and conditions, regularly maintaining and calibrating welding machines, and consulting manufacturer specifications for the electrodes and equipment in use. Additionally, welders should be trained to recognize the signs of improper voltage settings, such as arc instability or weld defects, to make real-time adjustments as needed.
What Voltage Should Be Used for Shielded Metal Arc Welding (SMAW)?
The best voltage for shielded metal arc welding (SMAW) typically depends on the electrode type and material being welded, but it generally falls within a specified range.
- Low Voltage (20-30 V): This range is suitable for thinner materials and smaller electrodes, as it provides better control over the arc and reduces the risk of burn-through.
- Medium Voltage (25-35 V): Most common for general-purpose welding, this voltage range allows for a stable arc and is versatile for various materials, including low carbon steels.
- High Voltage (30-40 V): Used primarily for thicker materials and larger electrodes, high voltage can penetrate deeper but may require more skill to manage heat input and control the weld pool.
- Variable Voltage Settings: Many modern welding machines offer adjustable voltage settings, allowing welders to fine-tune the voltage based on the specific requirements of the job, ensuring optimal results.
Low voltage settings (20-30 V) are ideal for applications where precision is necessary, such as thin sheet metal welding, as they help maintain a stable arc and minimize the risk of excessive heat causing warping or burn-through.
Medium voltage settings (25-35 V) are the most widely used in SMAW, catering to a variety of welding tasks on different types of materials, particularly when working with low carbon steel, as they strike a balance between penetration and heat distribution.
High voltage settings (30-40 V) are employed in heavy fabrication or when welding thick sections, allowing for deeper penetration but requiring careful management to avoid overheating the material or creating defects in the weld.
Adjustable voltage settings on welding machines provide flexibility, enabling welders to adapt to different materials, electrode types, and thicknesses, ultimately leading to improved weld quality and efficiency.
What is the Ideal Voltage for Gas Metal Arc Welding (GMAW)?
Solutions for achieving the best voltage settings include utilizing advanced welding machines that offer precise control over voltage and wire feed speed, as well as training welders to recognize the signs of improper voltage, such as inconsistent arc stability or excessive spatter. Implementing these practices can lead to superior weld quality and operational efficiency in GMAW applications.
What Voltage is Required for Flux-Cored Arc Welding (FCAW)?
The best voltage for flux-cored arc welding (FCAW) can vary based on the specific application and material being welded.
- Low Voltage (18-24 Volts): Typically used for thinner materials or when a lower heat input is desired to prevent burn-through. This range allows for better control and cleaner welds, particularly in vertical or overhead positions.
- Medium Voltage (24-30 Volts): Commonly used for general-purpose welding on mild steel and thicker materials. This voltage range provides a good balance between penetration and bead appearance, making it suitable for most structural applications.
- High Voltage (30-35 Volts): Used for heavier materials and situations where deep penetration is required. Higher voltages can increase the heat input, which can be beneficial for thicker welds but may also lead to more spatter and a less controlled arc.
- Voltage Adjustments for Different Wire Sizes: The diameter of the flux-cored wire can impact the required voltage; thicker wires typically need higher voltages to achieve proper melting and fusion. Adjusting voltage according to wire size ensures optimal performance and weld quality.
- Material Type Considerations: Different materials may require specific voltage settings to achieve desired welding characteristics. For instance, stainless steel and aluminum often require adjustments in voltage compared to carbon steel to accommodate their unique properties.
What Are the Risks and Consequences of Incorrect Voltage Settings in Arc Welding?
Incorrect voltage settings in arc welding can lead to several risks and consequences that affect both the quality of the weld and the safety of the welder.
- Poor Weld Quality: Incorrect voltage settings can result in inadequate penetration or excessive burn-through in the weld joint. This leads to weak welds that may not withstand the intended loads or stresses, compromising the integrity of the overall structure.
- Increased Spatter: Using the wrong voltage can cause excessive spatter during the welding process. This not only creates a mess that requires additional cleanup but can also lead to defects in the weld, as spatter can interfere with the metal’s surface and bonding.
- Electrode Damage: Setting the voltage too high can cause rapid overheating of the electrode, leading to premature wear or even melting. This not only increases material costs but can also affect the consistency and quality of the welds produced.
- Safety Hazards: Incorrect voltage settings can create hazardous situations, such as electrical shocks or burns. Moreover, excessive heat can ignite flammable materials nearby, posing a risk to the welder and surrounding personnel.
- Equipment Damage: Operating at incorrect voltage levels can strain welding equipment, potentially leading to malfunctions or failures. This may require costly repairs or replacements, increasing downtime and project costs.
- Operator Fatigue: If welders have to constantly adjust their technique or attempt to compensate for poor settings, it can lead to increased physical and mental fatigue. This not only affects the quality of work but also raises the risk of accidents due to reduced focus and concentration.
How Can Welders Ensure They Are Using the Correct Voltage?
To ensure they are using the correct voltage for arc welding, welders can follow several key practices:
- Consult the Welding Machine Manual: Always refer to the manufacturer’s manual for the welding machine to find the recommended voltage settings for various types of welding processes and materials.
- Understand the Material Thickness: The thickness of the material being welded plays a crucial role in determining the appropriate voltage; thicker materials generally require higher voltage settings to achieve a proper weld.
- Adjust Based on Electrode Type: Different electrodes have specific voltage requirements; for example, stick electrodes may need different settings compared to MIG or TIG welding wires.
- Monitor Arc Characteristics: Observing the arc’s behavior during welding can help determine if the voltage is correct—an ideal arc should be stable and maintain a consistent sound and appearance.
- Test Welds: Performing test welds on scrap material can help fine-tune voltage settings, allowing welders to evaluate the quality of the weld before working on the final piece.
- Use a Voltage Meter: Employing a voltage meter can provide precise voltage readings, ensuring that the welder is operating within the desired range for optimal results.
Consulting the Welding Machine Manual is essential as it provides specific guidelines for voltage settings based on the equipment and the welding process employed. Following the manufacturer’s recommendations helps to avoid common pitfalls and ensures safe operation.
Understanding the Material Thickness is critical because it directly influences the amount of heat required to penetrate the material adequately. For instance, when welding thicker materials, the welder may need to increase the voltage to achieve a proper weld pool.
Adjusting Based on Electrode Type is important as each type of electrode has its own optimal voltage range. For example, while a certain voltage might be ideal for a 6011 stick electrode, it may be too high or too low for a different type, affecting the quality of the weld.
Monitoring Arc Characteristics involves paying attention to the arc’s stability and sound, as a well-adjusted voltage will produce a consistent arc with a clear, hissing sound. An irregular arc can indicate either too high or too low voltage, prompting adjustments.
Performing Test Welds allows welders to gauge the effectiveness of their voltage settings before committing to a final project. This practice minimizes material wastage and provides a practical way to adjust the machine settings based on real-world conditions.
Using a Voltage Meter gives welders the ability to verify that the voltage output is within the desired range, providing an additional layer of accuracy. This tool can be especially useful in large-scale operations where consistent results are critical.
Related Post: