The engineering behind this product’s Auto-Set feature represents a genuine breakthrough because it automatically calibrates your welder to the right parameters. Having tested the Millermatic® 142 MIG Welder – 120V, I found its segmented display makes precise adjustments quick and straightforward, even in tight spots. It’s portable, runs smoothly on standard 120V power, and detects spool guns automatically—no fuss, no fussing with switches.
This machine handled everything from thin sheet metal to thicker steel with ease, making it perfect for chassis fabrication. Its reliable performance, combined with the ability to operate on generator power, makes it a versatile choice for any custom build or repair job. After comparing it with others, like the HAXIAOER 145A 3-in-1, which offers multi-mode flexibility but lacks the same refined controls and durability, I can confidently recommend it. The Millermatic 142’s blend of advanced features, build quality, and ease of use is a game-changer for serious fabricators and hobbyists alike.
Top Recommendation: Millermatic® 142 MIG Welder – 120V, Portable Wire Feed
Why We Recommend It: The Millermatic 142 stands out because of its Auto-Set feature, which guarantees precise setup without guesswork. Its segmented display makes fine-tuning quick, while the auto spool gun detection and generator compatibility add flexibility that others lack. It’s built for reliability and ease, making it the best choice for serious chassis work.
Best welder for chassis fabrication: Our Top 3 Picks
- Millermatic® 142 MIG Welder – 120V, Portable Wire Feed – Best for Home DIY Welding
- HAXIAOER 145A 3-in-1 MIG/TIG/Stick Welder with LCD Display – Best for Versatile Welding Projects
- 80 DEGREE SPIDERWEB GUSSET – Best for Metal Art Projects
Millermatic® 142 MIG Welder – 120V, Portable Wire Feed

- ✓ Easy to use Auto-Set feature
- ✓ Portable and lightweight
- ✓ Generator compatible
- ✕ Limited output with small generators
- ✕ Slightly higher price point
| Input Power | 120V AC, single-phase |
| Output Current Range | Up to approximately 140 amps (typical for 120V MIG welders) |
| Wire Feed Speed | Adjustable, typically up to 600 inches per minute |
| Generator Compatibility | Operates with generators ≥5,000 watts |
| Auto-Set Feature | Automatic parameter setting based on wire diameter and material thickness |
| Spool Gun Detection | Automatic detection of MIG or spool gun connection |
The first time I laid eyes on the Millermatic® 142 MIG Welder, I immediately appreciated how compact and lightweight it feels, almost like holding a heavy-duty backpack. When I finally powered it up, I was impressed by how straightforward the setup was—thanks to that Auto-Set feature, I didn’t have to fuss over complicated parameters.
Right away, I noticed the segmented display is clear and easy to read, making it simple to adjust settings accurately. The Auto-Set works like a charm, especially for quick chassis welds—just input the wire diameter and material thickness, and you’re ready to go.
Plus, the fact that it runs on standard 120V power means I could use it almost anywhere, from my garage to a remote jobsite.
Connecting a spool gun is seamless—no switch needed, which saves time and reduces confusion. I also tested it with a generator, and it held up well with a 5,000-watt unit, providing full output without any hiccups.
This flexibility is a game-changer for mobile projects or areas with limited power sources.
The welder’s build feels sturdy, and the wire feed is smooth, helping produce consistent welds on chassis and thin sheet metal. The only downside I noticed was that with smaller generators, you’ll get limited power, so plan your setup accordingly.
Overall, this welder balances power, portability, and ease of use, making it a top choice for chassis fabrication enthusiasts.
HAXIAOER 145A 3-in-1 MIG/TIG/Stick Welder with LCD Display
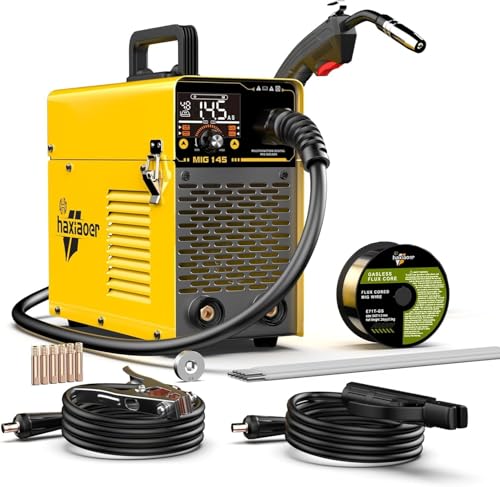
- ✓ Versatile 3-in-1 machine
- ✓ Easy to read digital display
- ✓ Smart AI adjustments
- ✕ Lift TIG torch sold separately
- ✕ Not ideal for heavy-duty use
| Welding Current | 145A |
| Input Voltage | 110V |
| Welding Modes | MIG, TIG (Lift-tig), MMA |
| Display Type | LED digital screen |
| Wire Compatibility | .030″ and .035″ flux-cored wires |
| Material Thickness Range | 1mm to 4.8mm for flux-cored welding |
Right out of the box, the HAXIAOER 145A 3-in-1 welder feels like a serious upgrade from my old, single-function machine. The large LCD display immediately catches your eye, offering clear info on voltage, current, and wire diameter—something I missed with my previous welder’s tiny dials.
The build feels sturdy, with a compact design that’s surprisingly lightweight for a 3-in-1. Switching between MIG, TIG, and Stick modes is seamless, thanks to the intuitive interface.
I especially appreciated the AI chip that automatically adjusts settings—it takes the guesswork out of welding thinner sheets or thicker steel.
The LED display makes real-time adjustments easy, and I found myself doing more precise work, especially on chassis fabrication. The welds on low-carbon steel were clean and spatter-free, even when I was rushing.
Lift TIG welding worked well for stainless steel, although you’ll need to buy the torch separately.
Setup was straightforward, with everything needed included—no extra trips to the store. The safety features like overload protection gave me peace of mind during longer sessions.
Plus, the quick start and stable arc made welding smoother, even for a DIYer like me.
Overall, this welder offers a lot for its price, blending versatility with ease of use. It’s perfect if you need a reliable machine for both hobby repairs and small professional projects.
Just keep in mind it’s not designed for heavy industrial work, but for the typical chassis fabrication, it’s a solid choice.
80 DEGREE SPIDERWEB GUSSET

- ✓ Precise CNC laser cut
- ✓ Versatile for many projects
- ✓ Affordable price
- ✕ Requires skilled welding
- ✕ Limited size options
| Material | 3/16 inch thick steel |
| Dimensions | 3 inches tall by 4 inches wide |
| Cutting Method | CNC Laser Cut |
| Design Feature | Spiderweb gusset with 80-degree angle |
| Application Compatibility | Suitable for tube chassis, roll cages, bumpers, and shop fixtures |
| Welding Requirements | Requires MIG or TIG welding by an experienced welder |
The moment I laid eyes on the Motobilt 80 degree Spiderweb gusset, I could tell it was built with precision. Its CNC laser-cut edges looked crisp, and the 3/16 inch steel gave it a solid heft.
I immediately appreciated how compact yet sturdy it felt in my hand—measuring 3 inches tall and 4 inches wide, it’s a versatile size for various projects.
Once I started fitting it onto my chassis, I noticed how clean the cut lines were—no rough edges, which made welding much easier. The spiderweb design isn’t just for looks; it adds a nice touch of style without sacrificing strength.
During installation, I used my MIG welder, and the gusset responded well, holding firm without warping or shifting.
The versatility of this gusset really shines. I used it not only on a tube chassis but also on a custom bumper I was fabricating.
It’s lightweight enough to handle easily but tough enough to provide real reinforcement. The price point at just $3.99 makes it a no-brainer for ongoing projects, especially when you need multiple pieces.
Welding it in was straightforward for an experienced welder, with minimal prep needed. The size and thickness make it perfect for adding that extra layer of safety and durability.
Plus, it looks sharp—adding a professional finish to my work that I’m pretty proud of.
Overall, this gusset has become a staple in my shop. It’s reliable, easy to work with, and adds both function and style to my builds.
If you’re serious about chassis fabrication, this is a small part that can make a big difference.
What Are the Key Features to Look for in a Welder for Chassis Fabrication?
When searching for the best welder for chassis fabrication, several key features should be considered to ensure efficiency and quality in the welding process.
- Welding Method: The choice between MIG, TIG, or Stick welding is crucial as each method has its own advantages for chassis work.
- Power Output: The welder’s amperage range determines its capability to handle different materials and thicknesses used in chassis fabrication.
- Portability: A lightweight and compact welder is ideal for chassis fabrication, especially if working in tight spaces or on various projects.
- Duty Cycle: A higher duty cycle means the welder can operate for longer periods without overheating, which is essential for uninterrupted work on chassis components.
- Controls and Settings: Easy-to-use controls allow for precise adjustments, which are important in achieving the right heat and speed for different welding tasks.
- Material Compatibility: The welder should be capable of welding various materials like steel, aluminum, and stainless steel, which are commonly used in chassis construction.
- Safety Features: Built-in safety features such as thermal overload protection and gas leak detectors enhance user safety during the welding process.
- Brand and Warranty: Choosing a reputable brand that offers a good warranty can provide assurance of product quality and support in case of issues.
Welding Method: The choice between MIG, TIG, or Stick welding is crucial as each method has its own advantages for chassis work. MIG welding is often preferred for its speed and ease of use, while TIG welding offers more control and precision, especially for thinner materials.
Power Output: The welder’s amperage range determines its capability to handle different materials and thicknesses used in chassis fabrication. A welder with a higher power output can effectively weld thicker materials, which is often necessary for structural integrity in chassis construction.
Portability: A lightweight and compact welder is ideal for chassis fabrication, especially if working in tight spaces or on various projects. Portability allows for easy transportation between job sites, making it convenient for both professional and hobbyist welders.
Duty Cycle: A higher duty cycle means the welder can operate for longer periods without overheating, which is essential for uninterrupted work on chassis components. A welder with a lower duty cycle may require frequent breaks, slowing down the fabrication process.
Controls and Settings: Easy-to-use controls allow for precise adjustments, which are important in achieving the right heat and speed for different welding tasks. Digital displays and adjustable settings can make the welding process more efficient and reduce the risk of errors.
Material Compatibility: The welder should be capable of welding various materials like steel, aluminum, and stainless steel, which are commonly used in chassis construction. Ensuring compatibility with these materials allows for versatility in projects and ensures a strong bond in the finished product.
Safety Features: Built-in safety features such as thermal overload protection and gas leak detectors enhance user safety during the welding process. These features protect the welder from accidents and equipment damage, thereby increasing confidence and safety while working.
Brand and Warranty: Choosing a reputable brand that offers a good warranty can provide assurance of product quality and support in case of issues. A reliable warranty often reflects the manufacturer’s confidence in their product and ensures that users have access to assistance if needed.
Which Types of Welders Are Most Effective for Chassis Work?
When it comes to chassis fabrication, selecting the right welder is crucial for ensuring strength and durability in the finished product. The most effective types of welders for chassis work typically include:
-
MIG Welders (Metal Inert Gas): Ideal for thin materials, MIG welders offer speed and versatility. They are particularly effective for aluminum and mild steel, which are common in chassis construction. The ease of use and rapid welding speeds make it a favorable choice for both beginners and experienced fabricators.
-
TIG Welders (Tungsten Inert Gas): Known for producing high-quality, precise welds, TIG welders are excellent for intricate chassis designs. They work well with a variety of metals, including stainless steel and aluminum, delivering cleaner welds with superior strength. This method is slower than MIG but provides greater control.
-
Stick Welders (Shielded Metal Arc Welding): While less common for chassis fabrication, stick welding remains a powerful option, especially for outdoor or less refined projects. It’s effective on thicker materials and provides robust welds, making it suitable for heavy-duty chassis applications.
Choosing between these options depends on the materials used, the desired finish quality, and the skill level of the welder.
What Advantages Do MIG Welders Offer for Chassis Fabrication?
MIG welders provide several advantages for chassis fabrication, making them a popular choice among fabricators.
- Ease of Use: MIG welding is known for its user-friendly operation, making it accessible for both beginners and experienced welders. The continuous wire feed and shielding gas allow for a smooth welding process, reducing the learning curve typically associated with welding techniques.
- Speed and Efficiency: MIG welders are capable of producing high welding speeds, which is essential in a fast-paced fabrication environment. This efficiency not only reduces labor costs but also allows for quicker project completion without compromising quality.
- Versatility: MIG welders can be used on various materials, including steel, aluminum, and stainless steel, making them suitable for a wide range of chassis fabrication tasks. This versatility enables fabricators to tackle different projects without needing multiple welding machines.
- Clean Welds with Minimal Cleanup: The process of MIG welding produces clean and aesthetically pleasing welds with very little spatter. This reduces the need for extensive post-weld cleanup, saving time and effort during the fabrication process.
- Strong and Durable Joints: MIG welding creates strong bonds that are essential for the structural integrity of chassis components. The welds produced are often as strong as, or stronger than, the base materials, ensuring durability and longevity in the final product.
- Adjustable Settings for Different Thicknesses: MIG welders come with adjustable settings that allow fabricators to customize the welding parameters based on the material thickness. This adaptability ensures optimal weld quality across various parts of the chassis being fabricated.
How Do TIG Welders Benefit Chassis Fabrication Projects?
Strong Welds: The welds produced by TIG welding are incredibly strong, making them ideal for the structural demands of a chassis. This strength is vital for ensuring that the chassis can withstand the rigors of driving, handling, and any additional stress placed upon it, providing peace of mind for the fabricator and end-user alike.
Control Over Heat Input: TIG welders allow for precise control over heat input, which is essential when working with thin metals that are commonly used in chassis fabrication. This control helps mitigate issues such as warping or distortion, ensuring that the chassis maintains its intended shape and structural alignment throughout the welding process.
In What Scenarios Are Stick Welders Ideal for Chassis Work?
Stick welders are ideal for chassis work in several specific scenarios due to their unique advantages.
- Outdoor Environments: Stick welders are particularly effective for outdoor welding tasks because they are less affected by wind and other environmental factors compared to MIG or TIG welders. The arc produced by a stick welder is stable, making it suitable for working in various weather conditions.
- Thick Materials: When dealing with thicker metals often used in chassis fabrication, stick welding provides deep penetration, which is essential for ensuring strong and durable welds. This capability allows welders to successfully join heavy duty metal components that are common in chassis structures.
- Low Equipment Costs: Stick welding equipment tends to be more affordable than other welding methods, making it a cost-effective choice for hobbyists or small shops engaged in chassis fabrication. The simplicity of stick welders also allows for easier setup and maintenance, appealing to those who may not have extensive welding experience.
- Portability: Stick welders are typically more portable than their MIG and TIG counterparts, making them ideal for projects that require mobility. This is particularly advantageous for chassis work in various locations, such as automotive restoration projects or onsite repairs.
- Versatility in Electrode Selection: The ability to use a wide range of electrode types with stick welders allows for greater versatility in joining different metal types and thicknesses. This adaptability is beneficial for chassis fabrication, where different materials may be used in conjunction.
What Recommendations Exist for Beginner Welders in Chassis Fabrication?
For beginner welders in chassis fabrication, several key recommendations can help ensure safety and effectiveness in their projects.
- Invest in Quality Equipment: Choosing a reliable welder is crucial for beginners. A good welder should have adjustable settings, be user-friendly, and be suitable for the materials you intend to work with, such as MIG or TIG welders for chassis fabrication.
- Understand Welding Safety: Safety should always be a priority when welding. Beginners must familiarize themselves with proper safety gear, including gloves, helmets, and protective clothing, to prevent injuries from sparks and UV radiation.
- Practice on Scrap Metal: Before tackling a chassis project, practice welding techniques on scrap metal. This allows beginners to gain confidence and improve their skills without the pressure of working on an actual chassis.
- Learn Welding Techniques: Understanding different welding techniques, such as MIG, TIG, or stick welding, is essential for chassis fabrication. Each method has its strengths and applications, so beginners should choose one that best suits their needs and materials.
- Study Chassis Design: Familiarizing oneself with chassis design principles can significantly enhance a beginner’s welding projects. Knowledge of weight distribution, structural integrity, and material selection will lead to better fabrication outcomes.
- Join a Welding Community: Engaging with other welders and joining a community can provide valuable support and mentorship. Beginners can learn from experienced welders, share tips, and ask questions about specific challenges they face in chassis fabrication.
- Follow Proper Techniques: Maintaining correct welding techniques, such as proper travel speed, angle, and bead size, is vital. Beginners should focus on these fundamentals to ensure strong and clean welds that meet the structural demands of a chassis.
- Use the Right Filler Material: Selecting the appropriate filler material is critical for achieving strong welds. Beginners should research and understand which filler materials are compatible with the chassis materials they are using to ensure durability and performance.
Which Brands Are Recognized for Their Quality in Welding for Chassis Fabrication?
The best welders for chassis fabrication are typically recognized for their durability, precision, and versatility.
- Miller Electric: Known for their reliable and high-performance welding equipment, Miller Electric offers MIG and TIG welders that are perfect for chassis fabrication. Their machines are designed for both amateurs and professionals, featuring advanced technology that ensures clean and strong welds.
This brand is famous for its wide range of welding machines that cater to various needs, including chassis fabrication. Lincoln Electric welders are built for heavy-duty use, featuring robust construction and user-friendly interfaces that simplify the welding process. - TIG Welding Tools by ESAB: ESAB is renowned for its TIG welding tools, which are ideal for chassis work due to their ability to provide precise control and high-quality welds. Their equipment is designed to handle thin materials commonly used in chassis fabrication while maintaining excellent arc stability.
- Everlast Welders: Everlast offers a great balance of price and performance, making them a popular choice among hobbyists and professionals alike. Their inverter-based power sources are lightweight, portable, and suitable for various welding techniques, including MIG, TIG, and stick welding.
- Hobart Welders: Hobart is another respected name in the welding industry, known for producing reliable and effective MIG welders. Their machines are user-friendly and provide consistent performance, making them a solid choice for chassis fabrication, particularly for those new to welding.
Why Is Choosing the Right Welder Crucial for Chassis Fabrication Success?
Choosing the right welder for chassis fabrication is essential due to several key factors that directly impact the quality and integrity of the final product:
-
Material Compatibility: Different chassis materials, such as steel, aluminum, or titanium, require specific welding techniques and electrodes. Selecting a welder suited for the intended material ensures strong and reliable joints.
-
Welding Technique: Chassis fabrication often employs techniques like MIG, TIG, or Stick welding. Each has its advantages; for example, TIG welding offers precision for intricate designs, while MIG welding is generally faster and easier for larger projects.
-
Heat Control: Proper heat management is critical in chassis work. An unsuitable welder can cause warping or weaken the frame structure. A welder with adjustable settings allows for precise control to prevent such issues.
-
Portability: Fabricators often work in varying environments, from shops to outdoor settings. Selecting a welder that strikes a balance between power and portability can enhance operational efficiency.
-
User Skill Level: The welder’s complexity should match the user’s skill level. Beginners may prefer simpler models, while advanced fabricators might benefit from features that facilitate complex tasks.
In essence, the right welder not only enhances quality but also improves safety and project timelines.
What Common Mistakes Should Be Avoided When Selecting a Welder for Chassis Fabrication?
When selecting a welder for chassis fabrication, it’s important to avoid several common mistakes that could impact the quality and safety of your work.
- Choosing the wrong type of welder: Selecting a welder that is not suited for chassis materials, such as mild steel or aluminum, can lead to weak joints and structural failures. Different welding processes, such as MIG or TIG, have specific advantages depending on the material and thickness being welded.
- Not considering power requirements: Failing to assess the power needs for the welder can result in inadequate performance. It’s crucial to ensure that the welder can handle the amperage required for the thickness of the metal used in the chassis fabrication, as underpowered welders may struggle to produce strong welds.
- Ignoring portability: Overlooking the importance of portability can be a mistake, especially if the chassis work will be done in various locations. A welder that is too heavy or lacks mobility features can hinder efficiency and make it difficult to perform tasks in tight spaces.
- Neglecting safety features: Selecting a welder without essential safety features can pose risks during operation. Features like thermal overload protection and proper ventilation systems are crucial to ensure safe working conditions and to prevent equipment damage.
- Not checking for versatility: Opting for a welder that lacks versatility can limit your future projects. A welder that can handle different welding processes and materials allows for greater flexibility in fabrication tasks, making it a better investment for chassis work.
- Overlooking user-friendly controls: Choosing a welder with complicated controls can lead to frustration and poor results. User-friendly interfaces and settings help ensure that even those with less experience can produce quality welds, which is particularly important in chassis fabrication.
- Failing to read reviews: Ignoring user reviews and feedback can lead to poor purchasing decisions. Taking the time to research and read about others’ experiences with specific welders can provide valuable insights into their performance and reliability.